

How to add the server monitoring plugin to WHM

Server Monitoring provides real-time insights into your server’s performance, including uptime, CPU usage, memory and disk space. This helps you quickly detect and resolve potential issues before they impact your clients. Monitoring can be easily enabled directly from WHM using the 360 Monitoring plugin. Ensure that your cPanel version is 128 or higher for compatibility and optimal performance.
Ensure that your cPanel version is 128 or higher for compatibility and optimal performance.
How to add server monitoring using the terminal
- Log into the WHM portal.
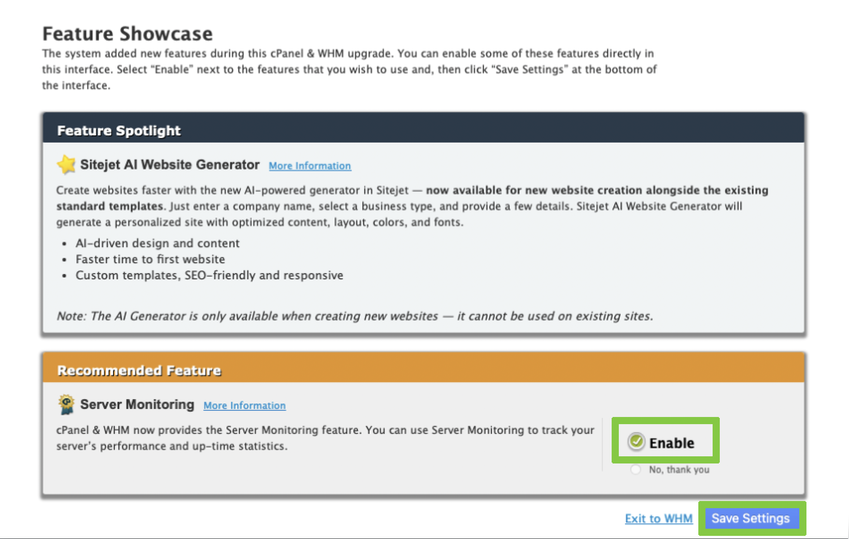
- When logging into WHM, you may be prompted with a setup screen, ensure that ‘Server Monitoring’ is enabled.
- Select ‘Save Settings’ to proceed.
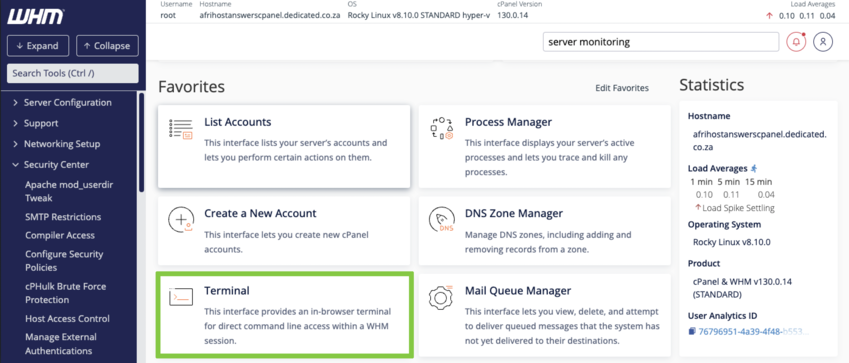
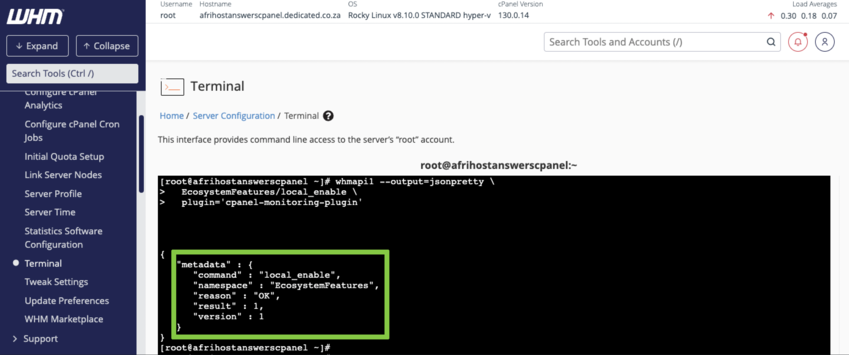
- Select ‘Terminal’ from the main page to open the command line interface.
You can access your server directly via SSH (Secure Shell) from your local computer. Please make sure to login using your root access credentials.
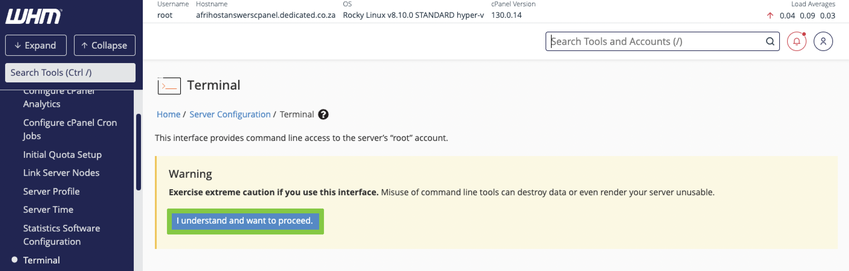
- A warning message will appear select ‘I understand and want to proceed’ to continue.
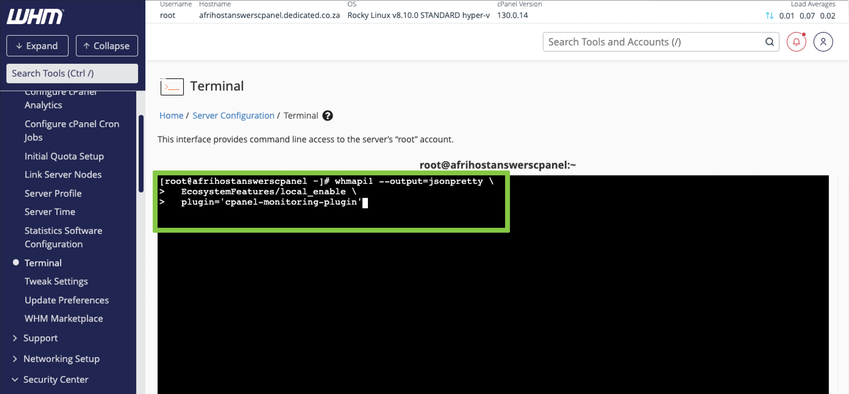
- The command line with root access will open.
- Enter the following command to run the installation script:
whmapi1 --output=jsonpretty \
EcosystemFeatures/local_enable \
plugin='cpanel-monitoring-plugin'
- Once the script has completed, a confirmation message will appear.
- Return to the main WHM interface under Plugins, the ‘Server Monitoring’ option will now be visible.

You have successfully added the server monitoring plugin.