

Website hosting
How to manage DNS records via ClientZone
ClientZone makes it easy to take full control of your DNS records. Whether you need to update website settings, configure email routing or connect to third-party services. You can manage everything directly from your ClientZone account. In the steps that follow, we will show you how to access, edit, create and save your DNS records.
How to access your DNS Editor in ClientZone
- Log into ClientZone.
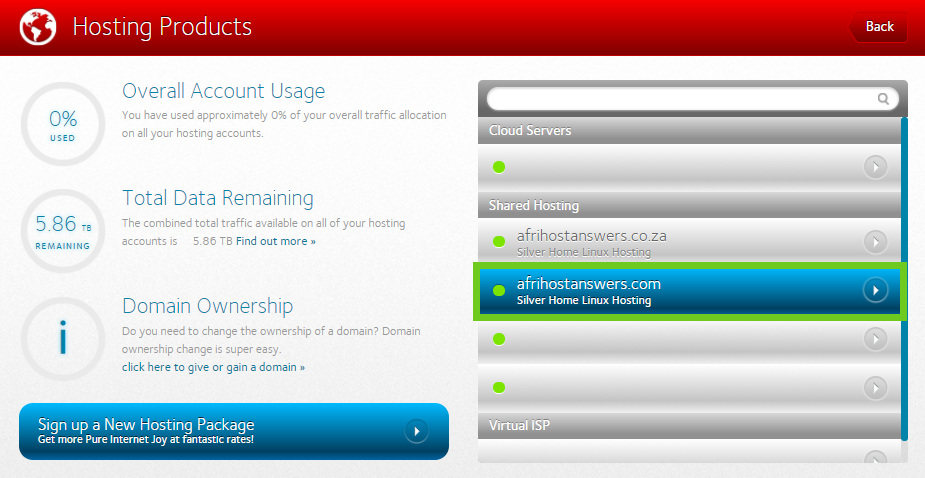
- Click on the ‘Hosting’ tab.

- Select the domain you want to edit.
- Now click on the ‘Hosting Settings’ button.
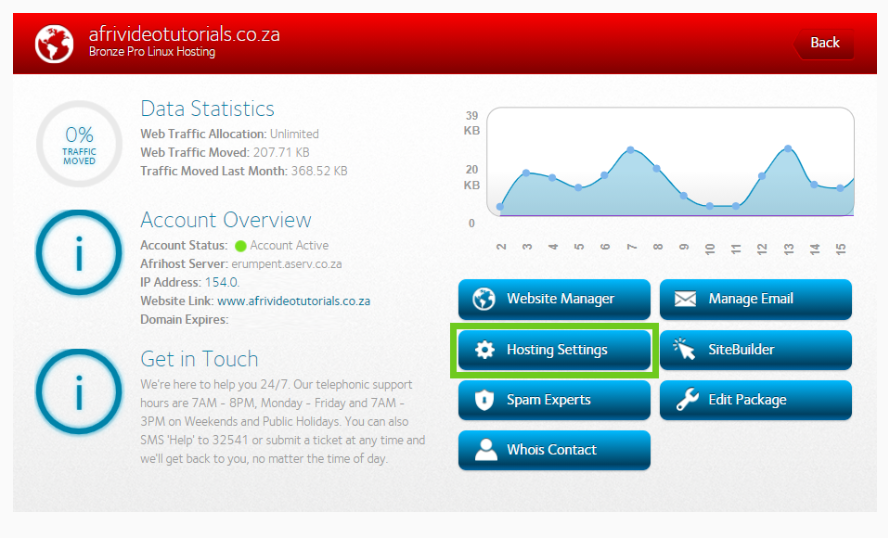
- Select ‘DNS Editor’.

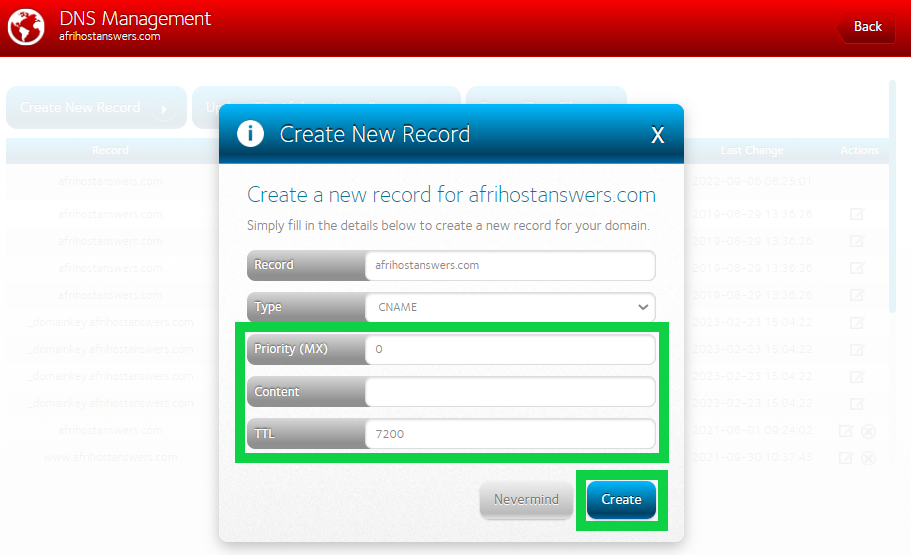
How to create a new DNS record
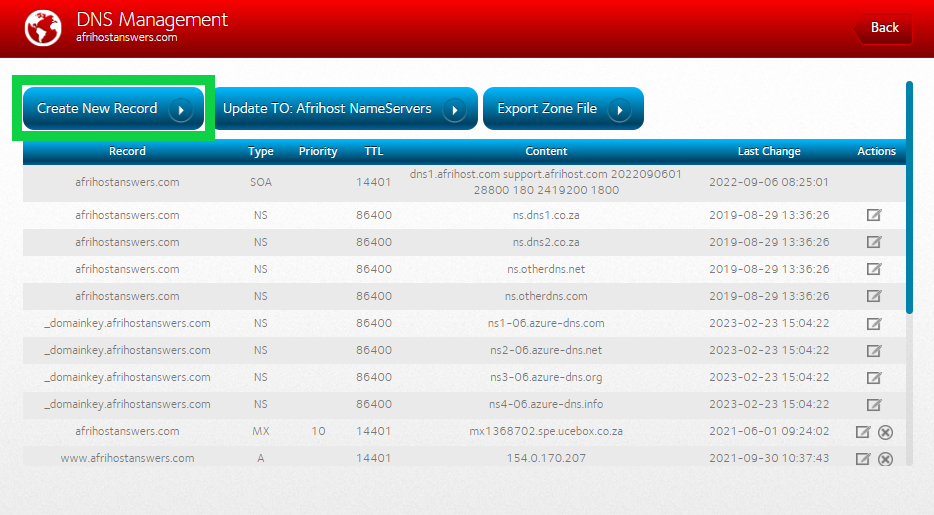
- To create a new record, select ‘create new record’ on the top left.
- Select the type of record you want to create.
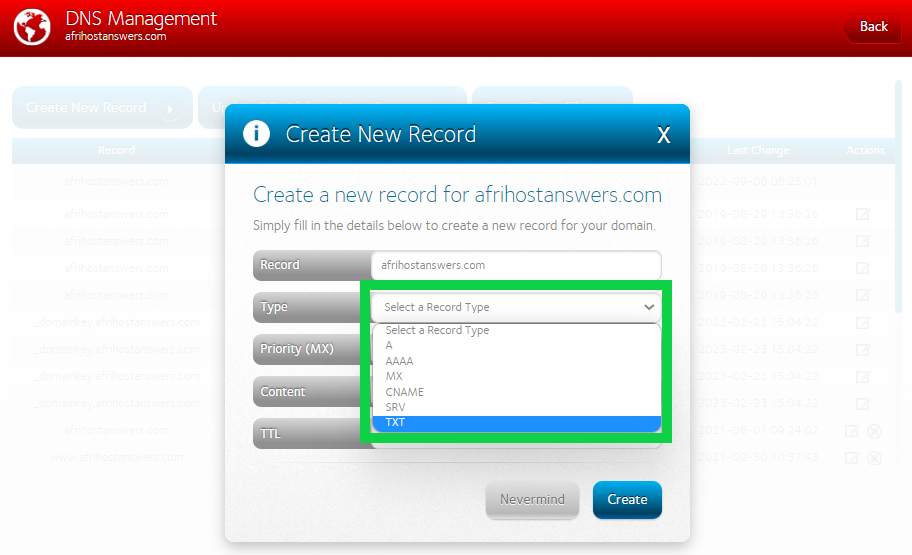
- Now, add in the DSN details under ‘content'.
- Enter '0' (zero) under the 'priority' field.
- Set up a TTL. The standard TTL is 7200.
- Clickn the ‘Create’ button to proceed.
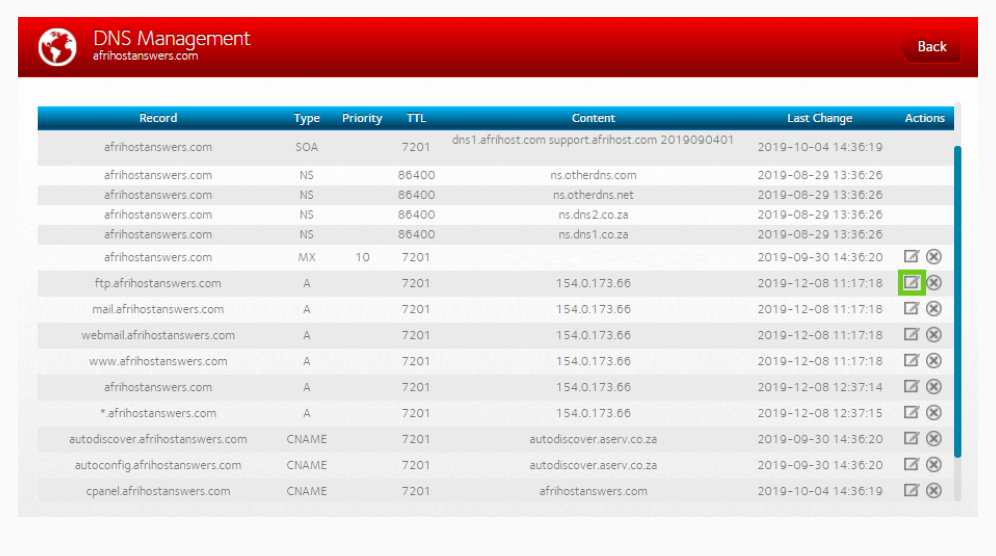
If you scroll down you will now be able to see the new DNS record you have created.
How to change your DNS settings
Once in the DNS Editor, you’ll now be able to see all the current DNS records for your selected domain.
- To make changes to these settings, scroll to the DNS setting you want to change and select the ‘pencil’ edit checkbox, under the Actions section on the right-hand side.
- Make your edits to the record settings.
- Once done, click ‘Update’.
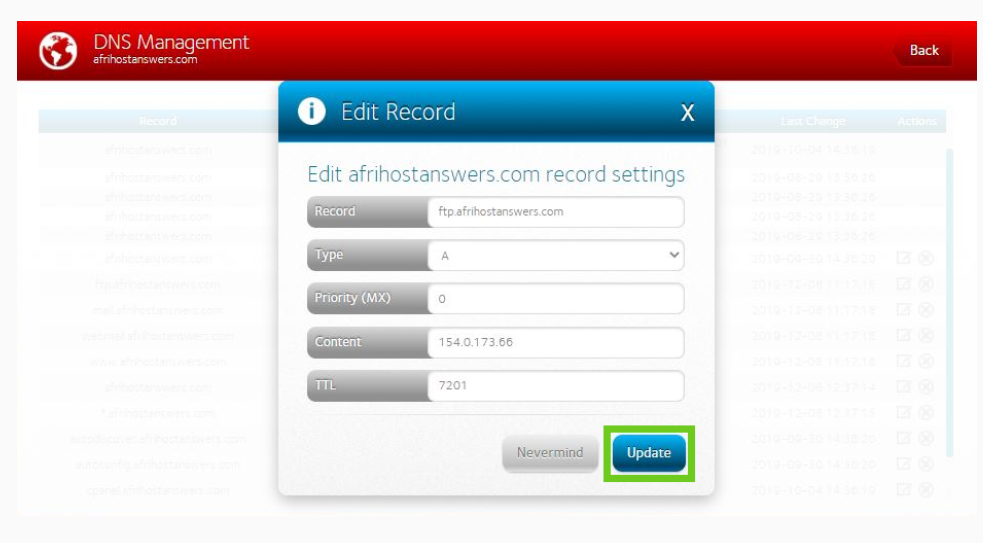
You have successfully updated your DNS records.
DNS records.
If you would like to know What is DNS, please read our Help Centre article for further assistance.