How to manage your RICA information in ClientZone
RICA is a law passed by the South African government that requires ALL mobile device users to register their numbers/ sim cards. Afrihost is lawfully required to RICA every Afrihost SIM Card with the required RICA documents of the person who is taking ownership of the SIM card.
You are no longer required to supply physical RICA documents to the courier upon delivery. Once your order is placed, and it requires to be RICA’d, you will be prompted to upload your RICA documents via ClientZone or the Afrihost Mobile App. This process is called eRICA.
Orders that require to be RICA’d will only be packed and dispatched once your RICA documents have been uploaded and verified. Please ensure to keep your RICA information up to date to avoid delivery delays.
Required RICA documents
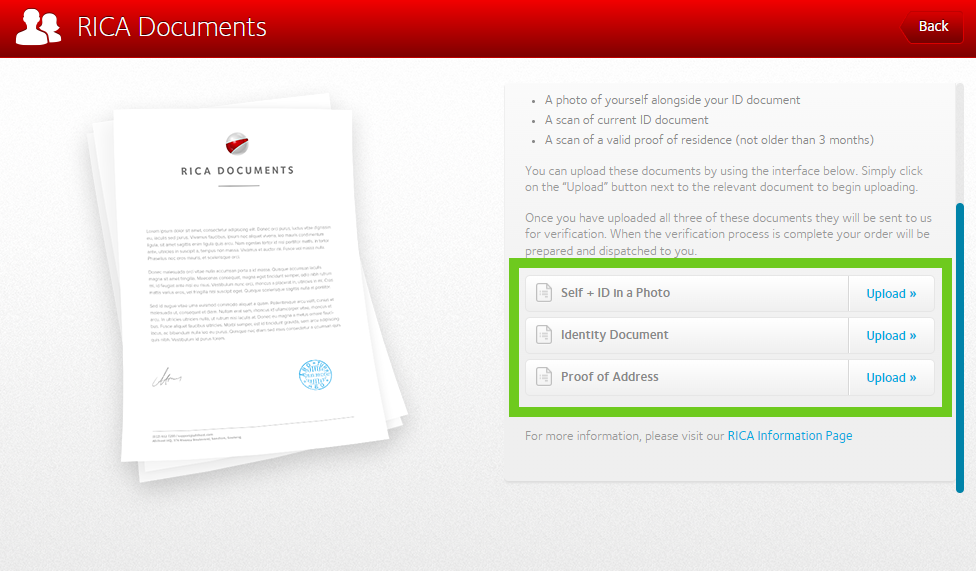
- A photo of yourself alongside your ID. (Yes, a selfie)
- A scan of your South African ID or foreign passport.
- A scan of a valid proof of residence. (not older than 3 months)
Valid identity documents
- South African ZA Green Barcoded ID book or Smart Card
- Foreign passport (including any supporting documents)
Valid proof of residence
- Bank Statement or Municipal Bill (not older than 3 months).
- Cellphone or Retail Account (not older than 3 months).
- Any document that is issued on a monthly basis, that is not older than 90 days, containing one’s residential address and name.
Valid selfie with identification in hand.
- Self-facing picture (selfie) with face clearly visible and identity document also clearly visible in the picture.
You can easily perform the following in ClientZone:
- Locate your RICA contacts.
- Add a new RICA contact.
- Upload your RICA documents.
- Edit existing RICA contacts.
1. Where to find your RICA contacts.
Afrihost is lawfully required to RICA every Afrihost SIM Card with the required RICA documents of the person who is taking ownership of the SIM card. This person is known as the RICA contact.
- Log into ClientZone.
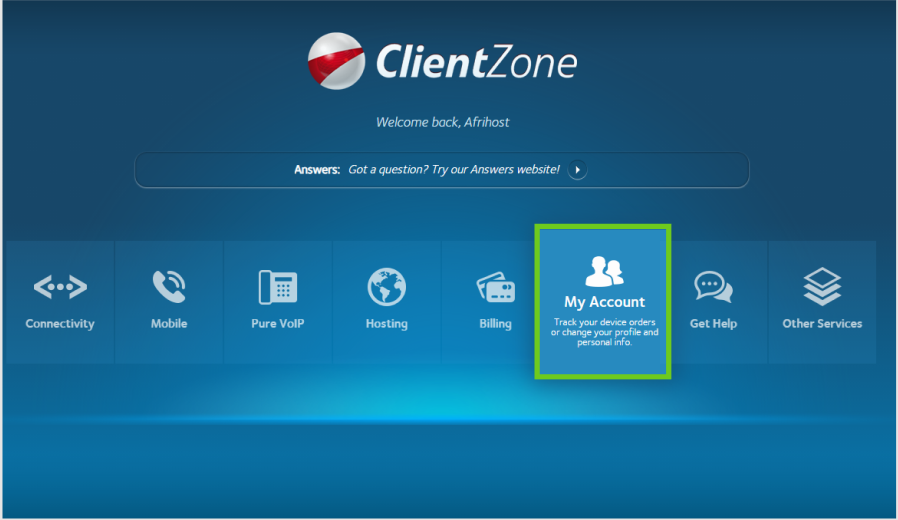
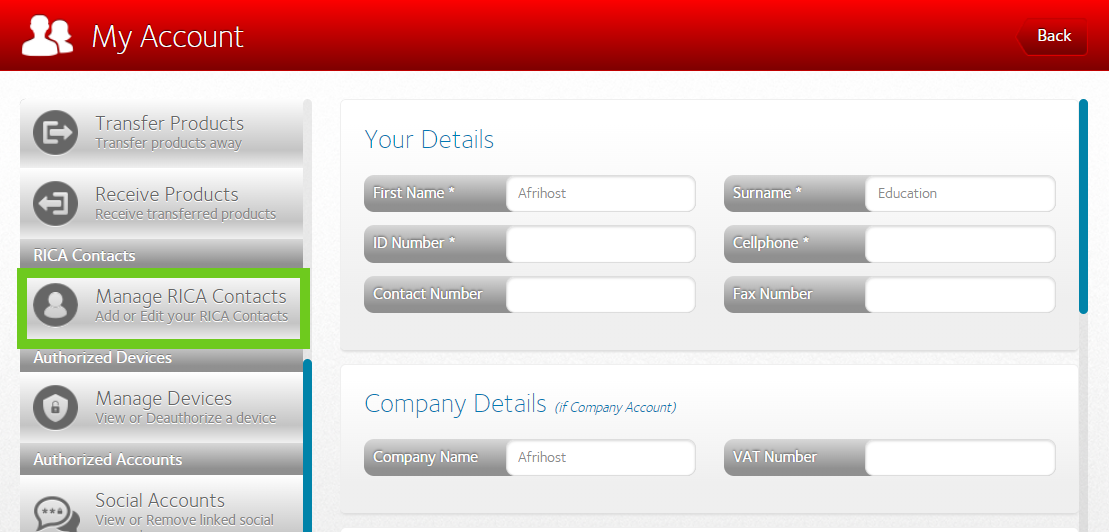
- Click on the ‘My Account’ tab.
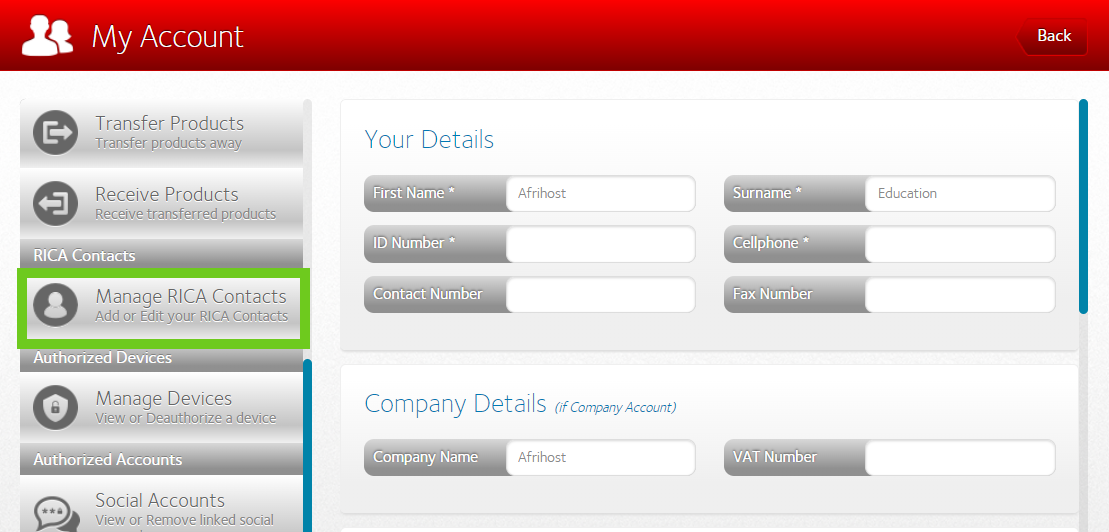
- On the left sidebar, scroll down to the RICA Contacts section.
- Click on ‘Manage RICA Contacts’ below.
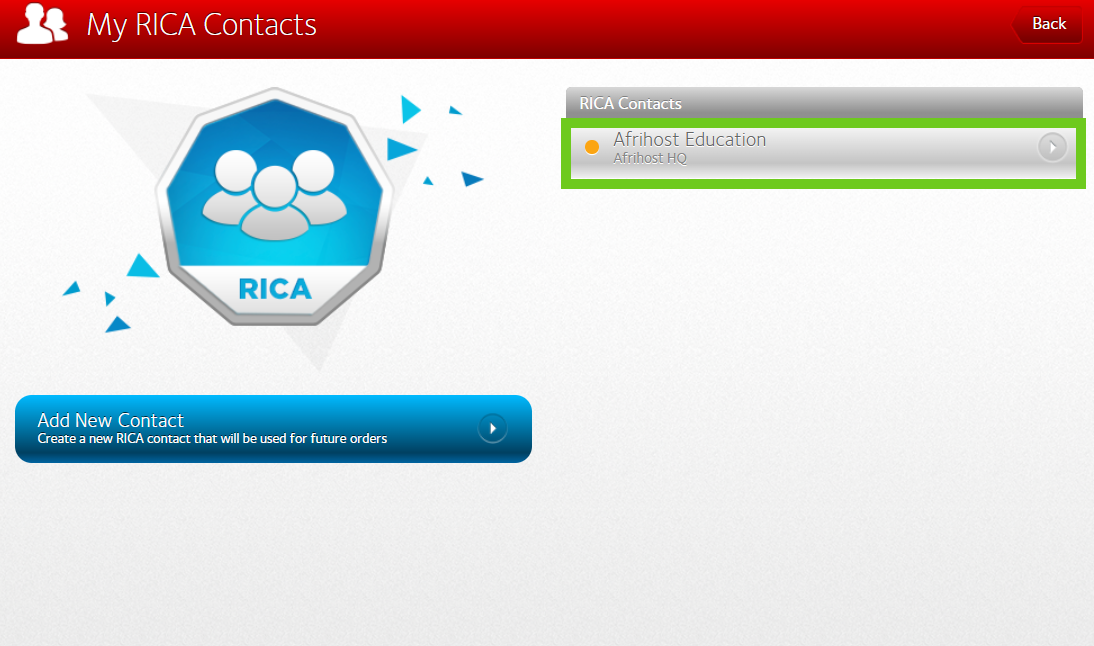
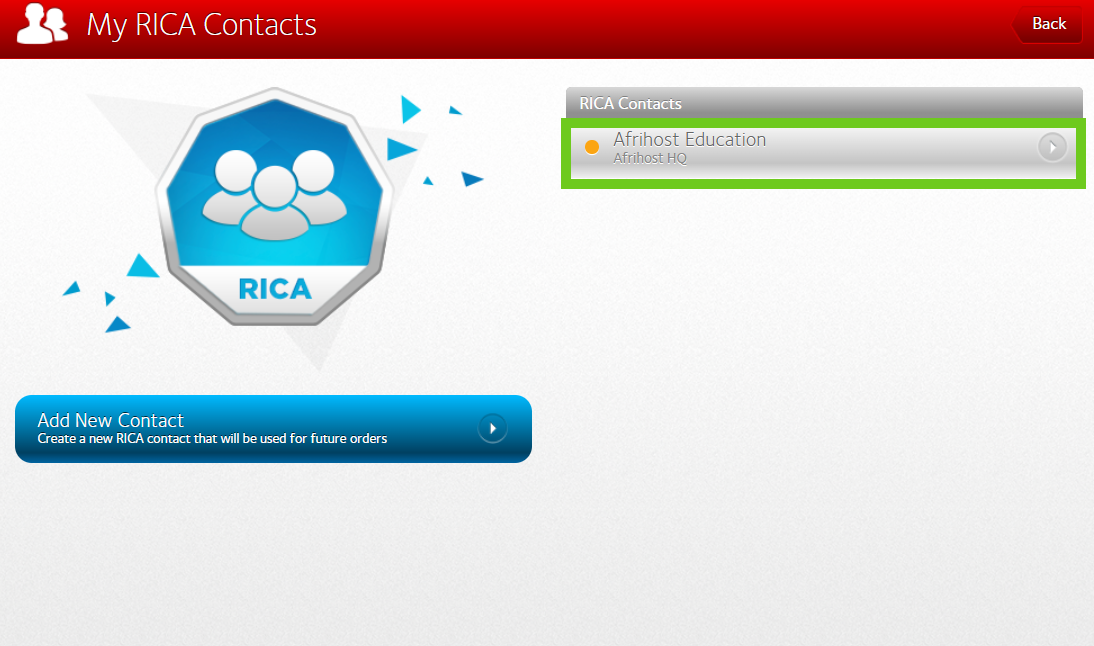
- The RICA Contacts will be displayed on your right-hand side.
Follow the instructions below if you would like to add a new RICA contact.
2. How to add a new RICA contact.
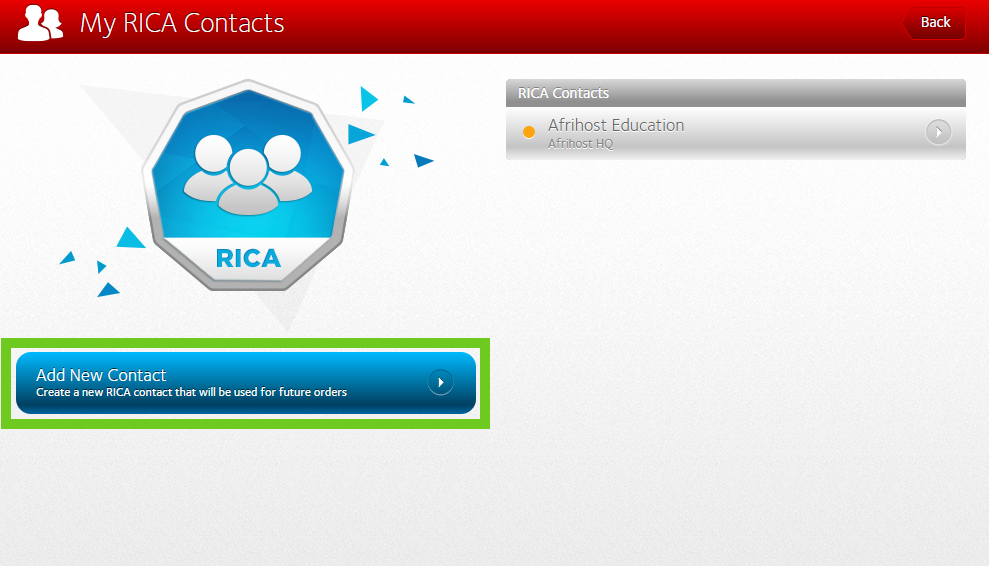
- Click on the ‘Add New Contact’ button on the left-hand side.
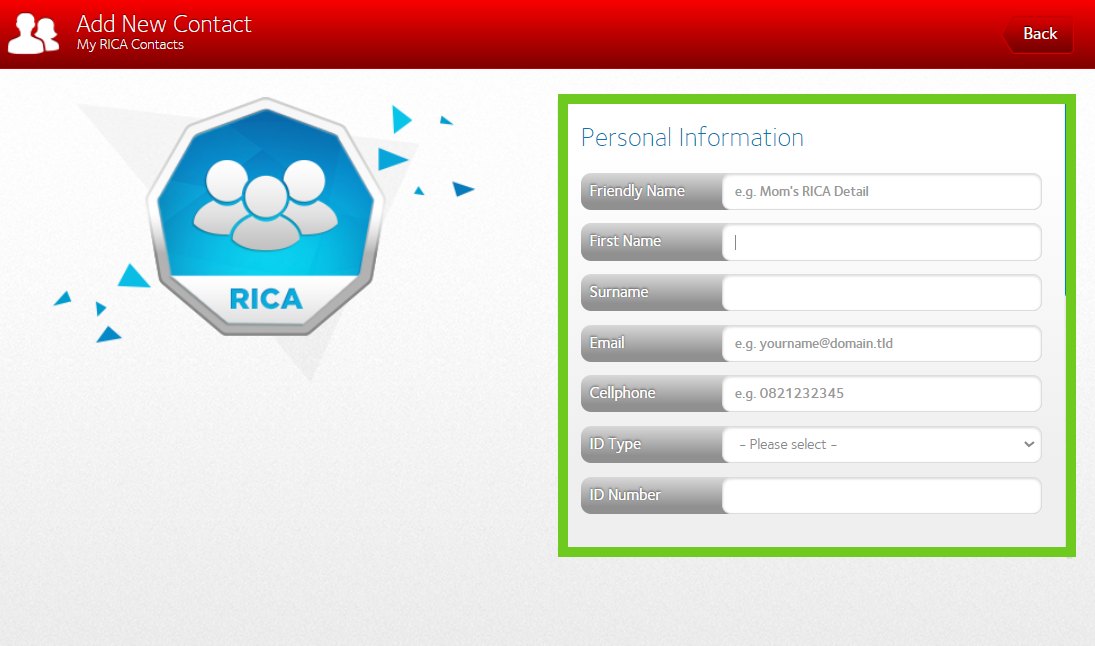
- Fill in your ‘Personal Information’.
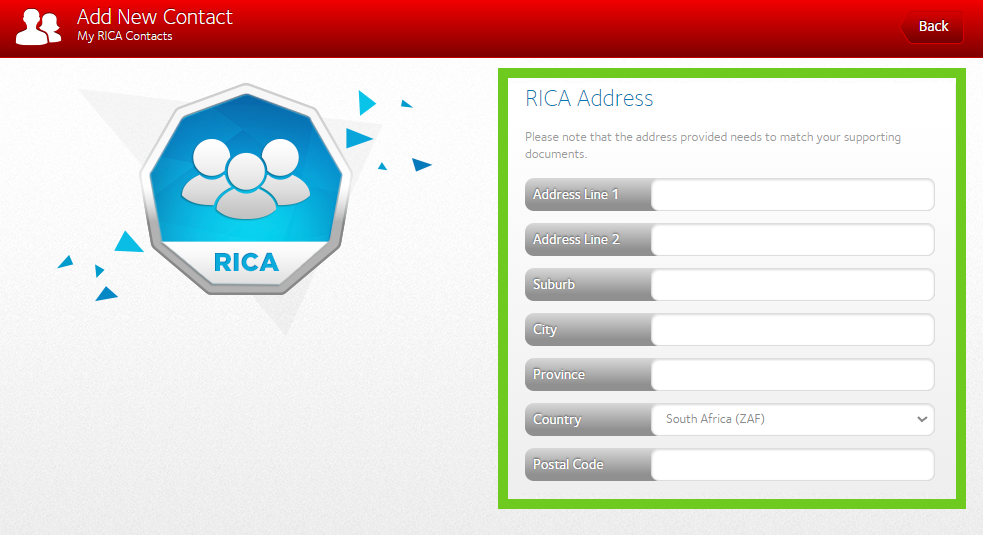
- Scroll down to fill in your ‘RICA Address’ details.
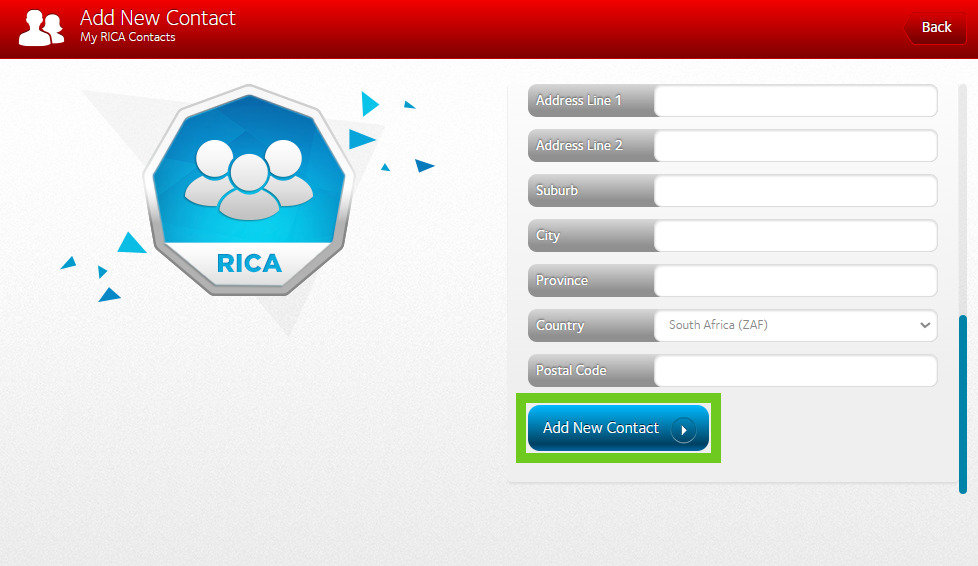
- Scroll down and click ‘Add New Contact’.
Once your information is captured, you’ll be asked to upload all required RICA documents
Follow the instructions below to upload your RICA documents
3. How to upload RICA documents.
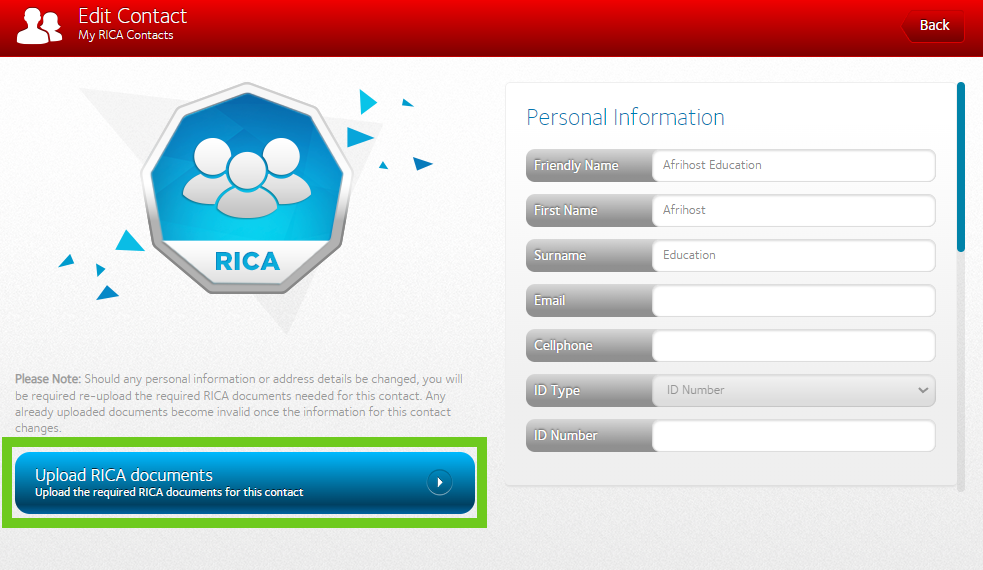
- Click on the relevant RICA contact on the right-hand side.
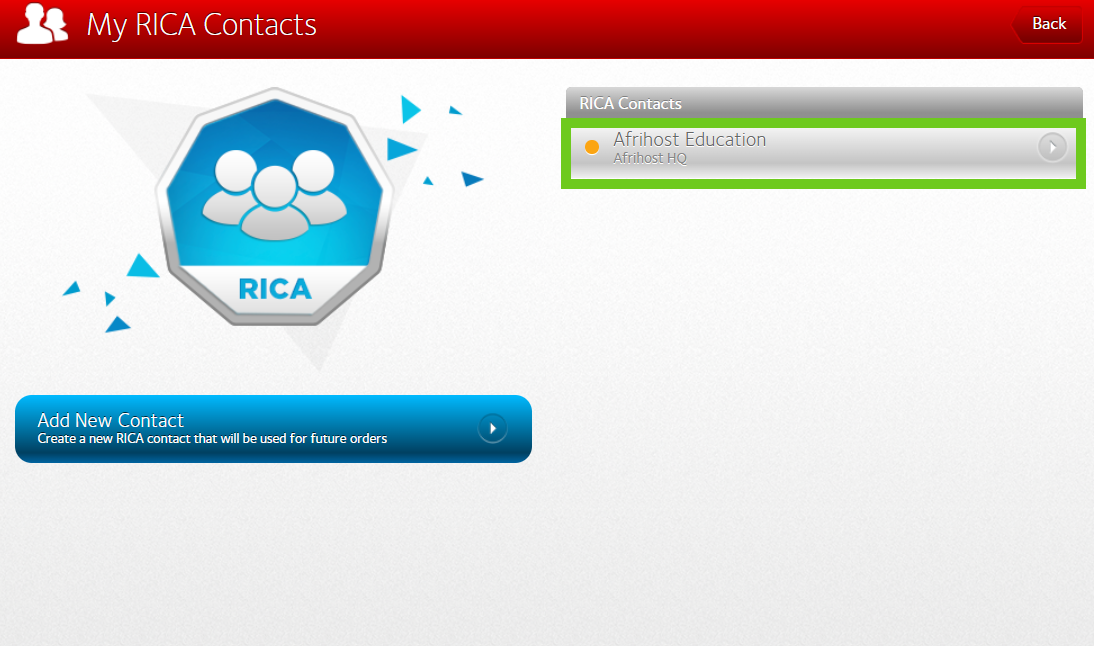
- On the left-hand side, click on ‘Upload RICA documents’.
- Click on the ‘Upload’ button next to each document type to upload your documents.
The RICA documents expire after 3 months. A reminder will be sent to you when your RICA documents are due to expire.
The documents will take approximately one business day to be verified.
4. How to edit an existing RICA contact.
- Log into ClientZone.
- Click on the ‘My Account’ tab.

- On the left sidebar, scroll down to the RICA Contacts section.
- Click on ‘Manage RICA Contacts’.
Should any personal information or address details be changed, you will be required re-upload the required RICA documents needed for this contact. Any already uploaded documents become invalid once the information for this contact changes.
- Click on the relevant RICA contact.
- Make the necessary changes.
- Scroll down and click on ‘Update Contact’.
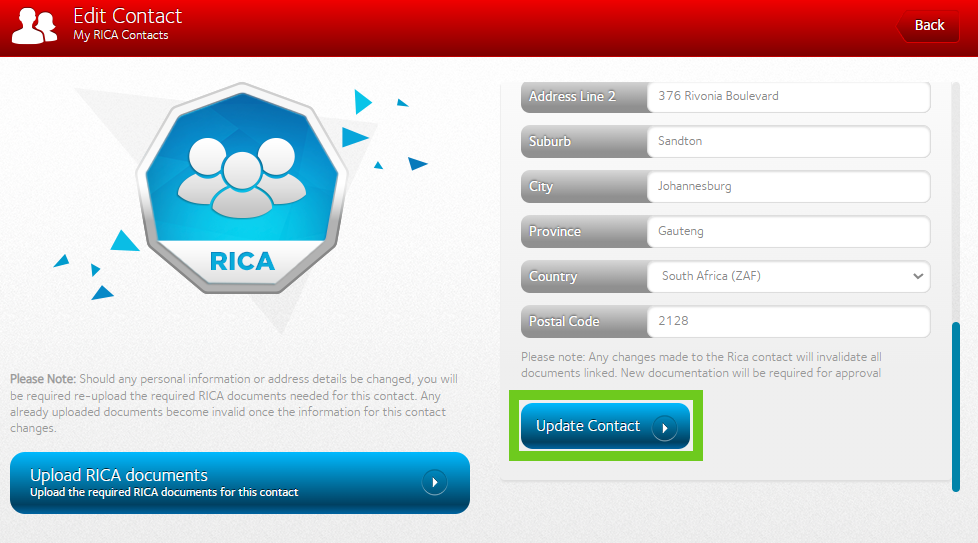
Once the changes have been saved, you will be required to upload the RICA documents with the updated information.
The RICA documents expire after 3 months. A reminder will be sent to you when your RICA documents are due to expire.
Unfortunately, you cannot delete a RICA contact as it is legal documentation but you can update a RICA contact as explained above.

