

How to connect a Windows computer to a PPPoE broadband connection
In some cases, a broadband fibre connection needs to be tested using a computer directly connected to the ONT device via a LAN cable. For example, if there is no internet connectivity on the router, you may want to determine whether the issue originates from the router or the ONT device.
While DHCP connections require no configuration, PPPoE connections do require a few configuration steps on a computer before they can work. This helps to isolate possible router-related authentication and speed issues.
In the examples below we use a Windows 11 computer, however, the procedure is similar on Windows 10.
DHCP connects by obtaining an IP address and then connects automatically and should not require set up. PPPoE connects via a username and password provided by the ISP (Internet Service Provider). PPPoE is used for Openserve and Vodacom fibre connections only. DHCP is used for all the other fibre providers.
The steps below apply to Openserve and Vodacom Fibre only.
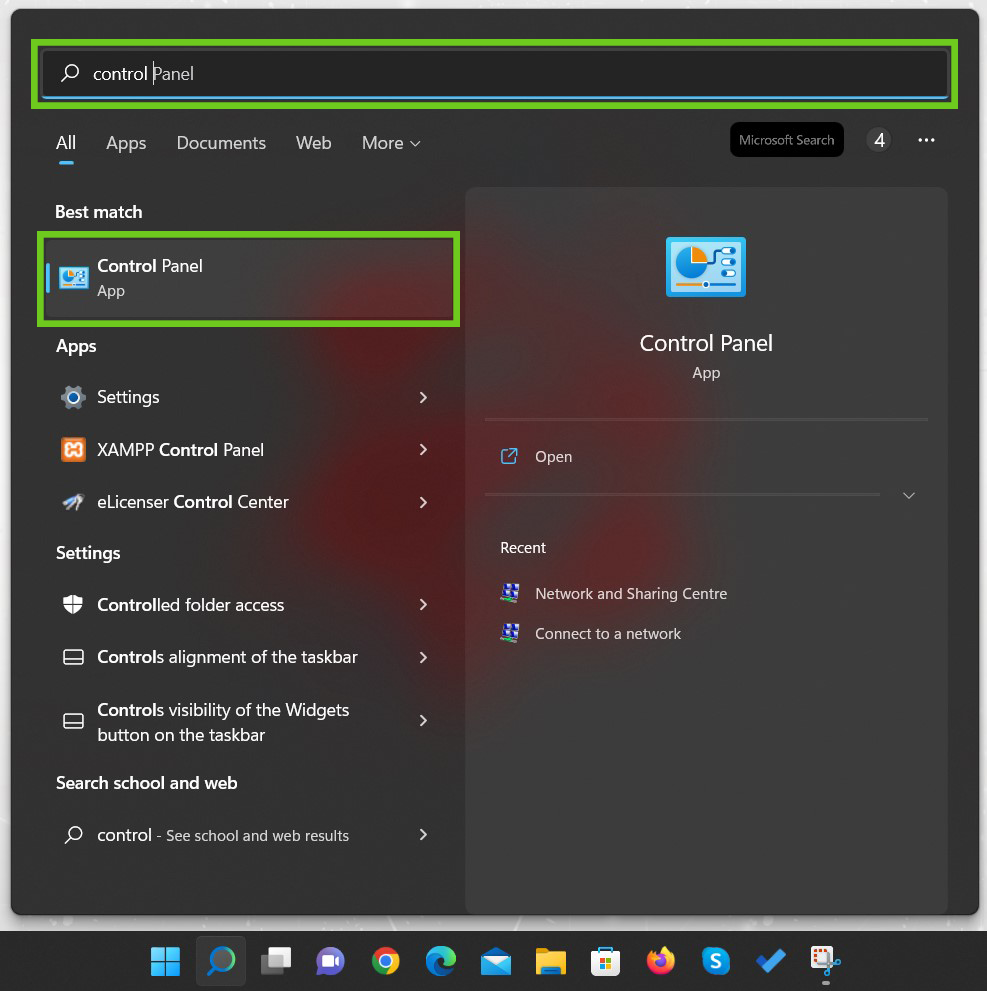
- On your Windows device home screen, click the search icon or magnifying glass next to the Windows Start button on the taskbar.
- Type ‘Control Panel’ in the search bar.
- Select Control panel.
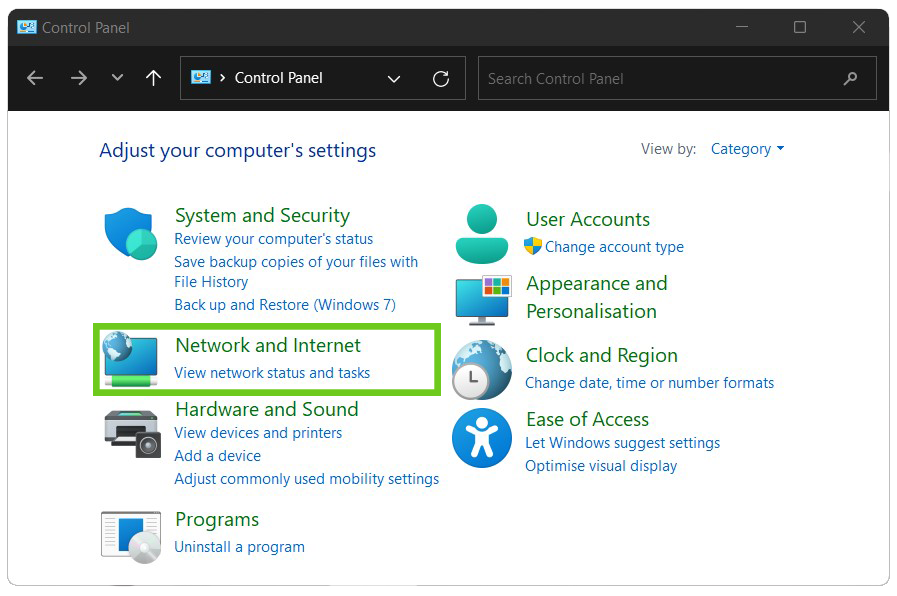
- From the options available in the Control Panel, select Network and Internet.
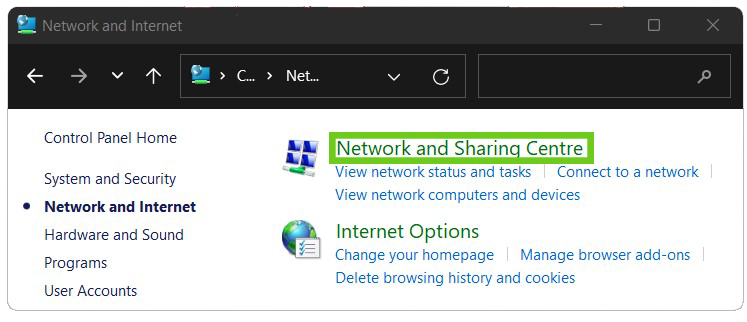
- Select Network and Sharing Centre.
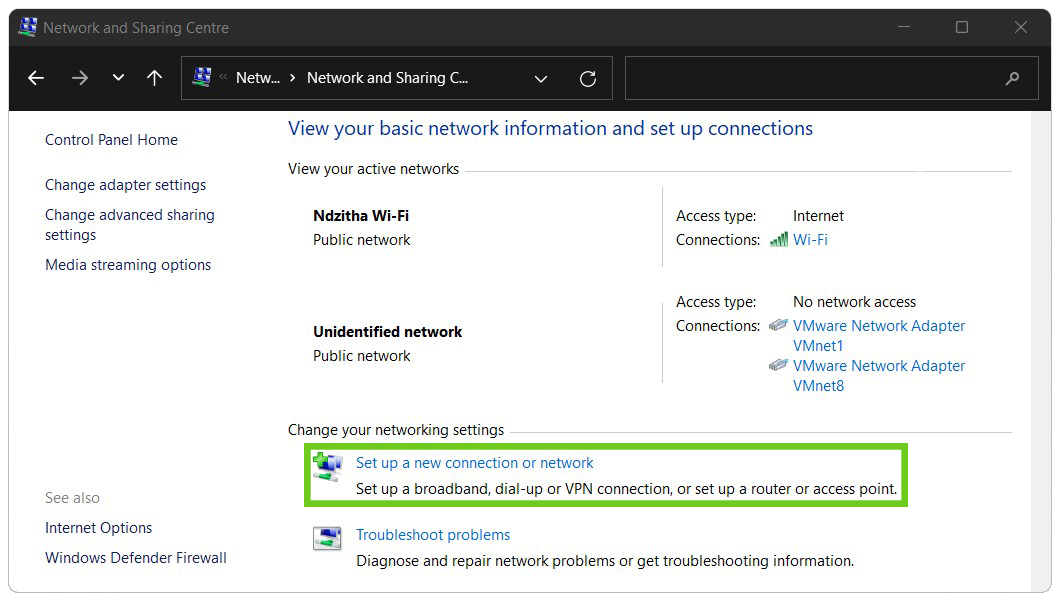
- Click on ‘Setup a new connection or network’.
- Select 'Connect to the Internet'.
- Click the ‘Next’ button.

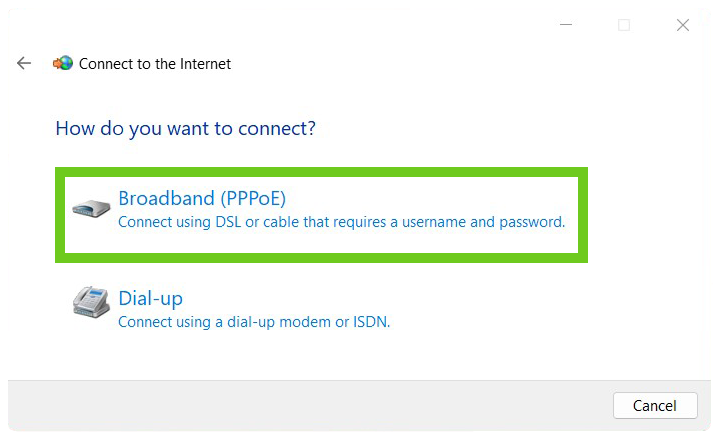
- Select ‘Broadband (PPPoE)’ under 'How do you want to connect?'.
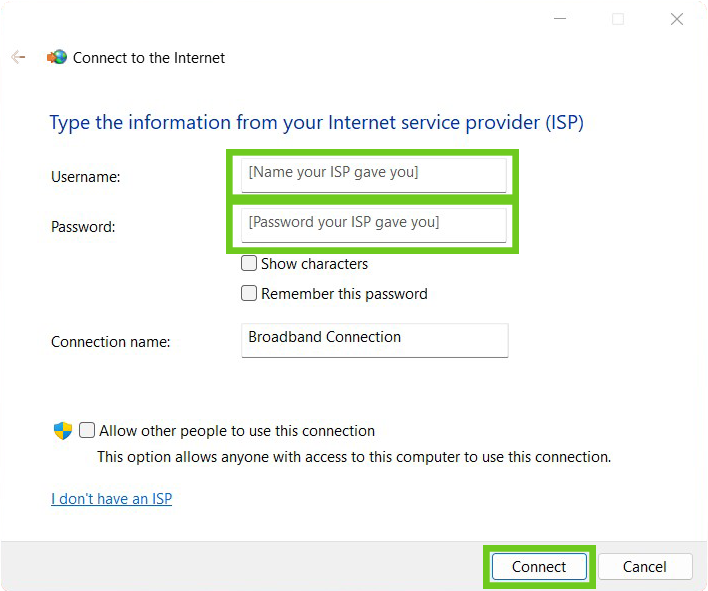
- Type in your PPPoE username and password that you received from Afrihost (You may leave the ‘Connection name’ blank)
You can find your PPPoE username and password in the email or SMS that you received from Afrihost. If you can’t find it, you can simply reset the PPPoE password on ClientZone.
- Click the ‘Connect’ button.
This will connect the computer to the internet without using a router.