

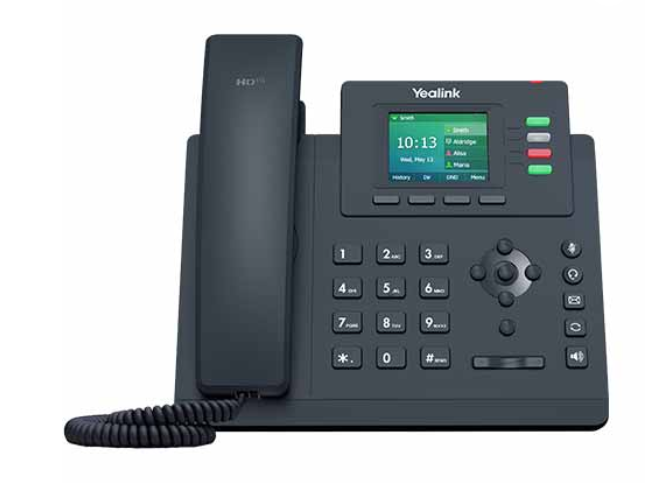
How to setup the Yealink SIP-T33G VoIP phone
VoIP allows you to make telephone calls over a high-speed Internet connection. Pure VoIP is an alternative telephone service that works off your existing internet connection.
The Yealink VoIP phone is compatible with Afrihost Pure VoIP and is available for purchase from the Afrihost website or during your sign up of Pure VoIP.
Phone Specifications
- 2.4 inch (320×240) pixel colour LCD display.
- 2 x Ethernet ports 10/100/1000 PoE support.
- Up to 4 VoIP accounts.
- 4 x Dual colour line keys.
- Hall switch.
- Wall-mountable.
- High-definition voice support.
Package Contents
- QuickStart Guide.
- IP Phone.
- Handset.
- Handset cord.
- Ethernet cable.
- Power adapter.
- Phone Stand.
- Wall Mount bracket.
How to set up your Yealink VoIP phone with your Afrihost Pure VoIP Account
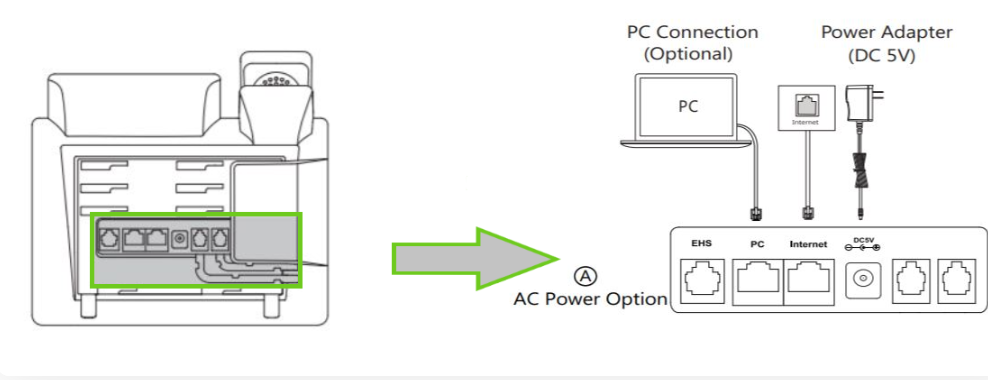
Connect the hardware
- Assemble the phone as per the included user guide in the box.
- Attach the stand at the back of the device as desired.
- Connect the handset into the port on the left-hand side of the device.
- Connect the network cable into the internet port.
- Connect the power adapter to the device and a plug point.
There are two ways to configure the phone
- Via the phone’s user interface.
- Via the internet web user interface.
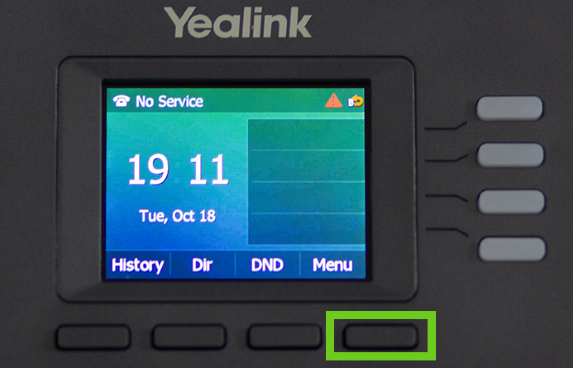
1. How to configure the phone via the phone interface
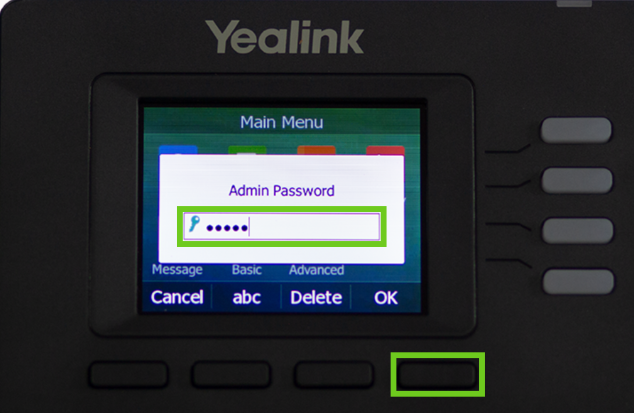
- On the phone, press the soft-key button under ‘Menu’.
- Use the arrow keys to navigate.
- Scroll down to ‘Advanced’.
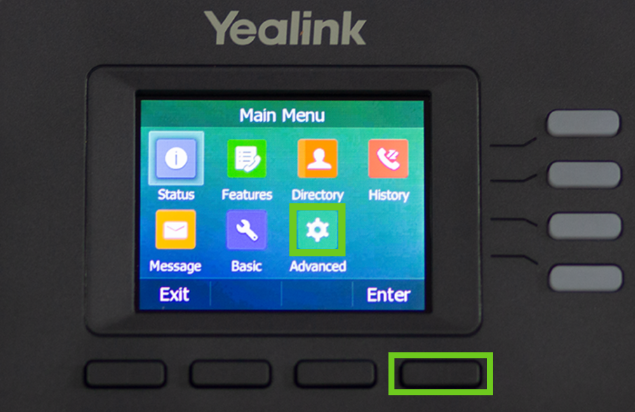
- Using the alphanumeric keypad, enter the default password: admin
- Press the ‘OK’ button.
- Press ‘Enter’ to select Accounts.
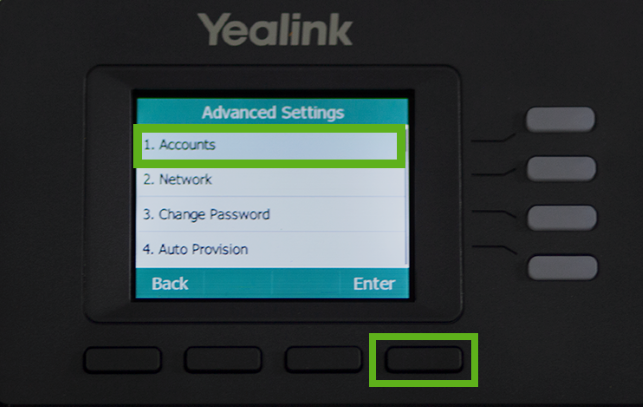
- Use the first ‘(Empty) Disabled’ account.
- Press ‘Enter’ to select this account.
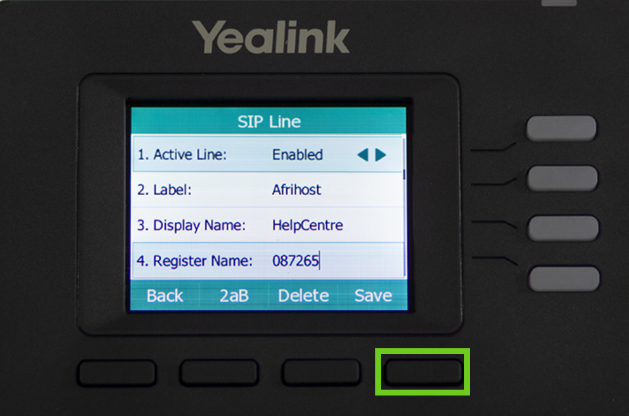
Configure the following parameters ONLY:
- Active Line: Enabled
- Label: Enter the name of the account that you want to be displayed on the LCD screen.
- Display name: Enter the name that will display when making a call.
- Register Name: Enter the VoIP username provided.
If you would like to know How to find your VoIP credentials, please read our Help Centre article for further assistance.
The username and register name will start with a new 087 allocated VoIP number or a ported South African number that starts with 01, 02, 03, 04 and 05. Never a mobile number such as 083, 072 and 061, etc or 0800/0860 numbers.
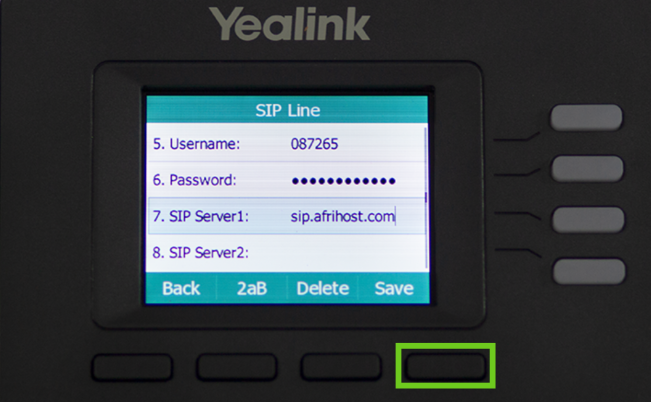
Press the ‘down’ arrow to get to the next settings screen.
- Username: enter the username provided.
- Password: enter the provided VoIP password.
- SIP Sever1: sip.afrihost.com.
- Press the ‘Save’ button.
The account details will be saved on the device. You can now make and receive VoIP calls.
2. How to configure the phone via the web user interface
Press the ‘OK’ button on the Yealink VoIP phone to view the IP address.
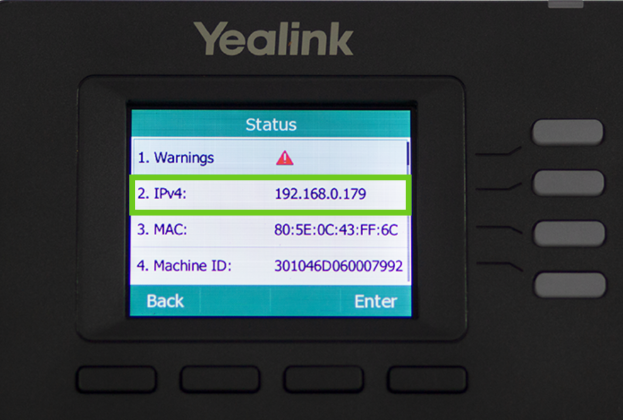
- Open your preferred web browser on your computer. (e.g.: Chrome, Internet Explorer, Firefox, Safari)
- Enter the default IP address of the Yealink phone in the search bar e.g.: ‘http://192.168.0.10’, and then press ‘Enter’ to search.
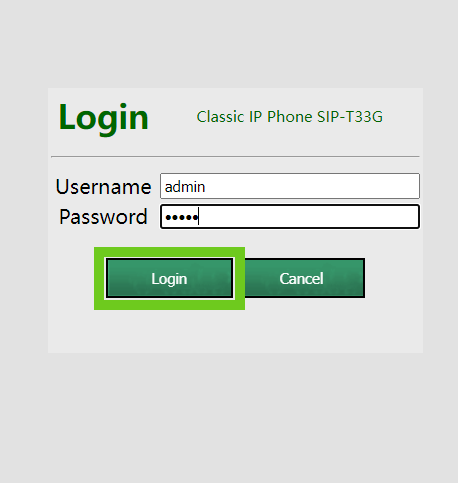
- Enter the username (default: admin) and password (default: admin) on the login page and click ‘Login’.
Select the 'Security' tab to change the login password to something more secure.
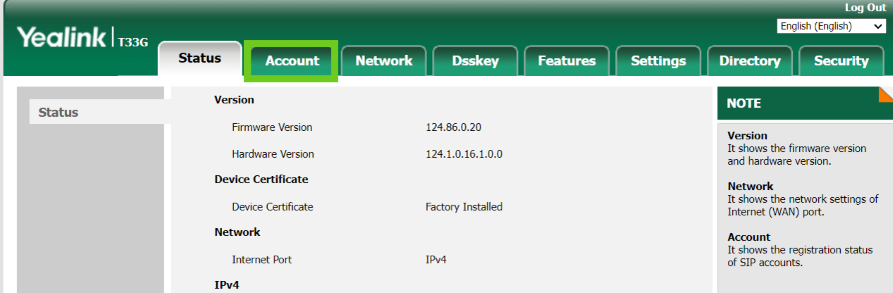
Once you have logged in, you will be presented with the status page.
- Select ‘Account’ from the top menu.
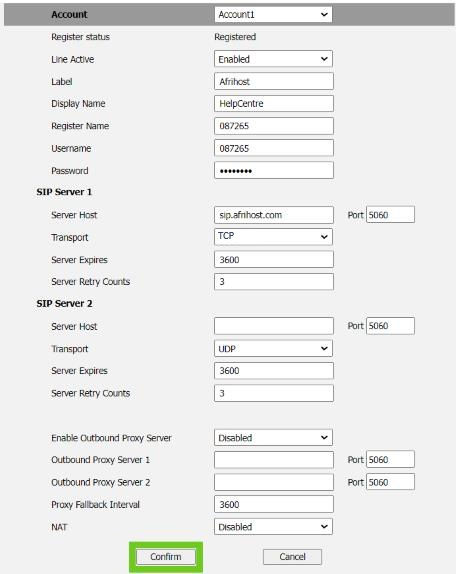
Configure the following parameters ONLY
- Line Active: Enabled.
- Label: Enter the name of the account that will display on the LCD screen.
- Display name: Enter the name that will display when making a call.
- Register Name: Enter your VoIP username.
- Username: VoIP username from Afrihost.
- Password: Enter the provided VoIP password.
- SIP Server 1 - Server Host: sip.afrihost.com.
- Transport: TCP.
- Select ‘Confirm’ at the bottom to save these settings.
If you would like to know How to find your VoIP credentials, please read our Help Centre article for further assistance.
Your VoIP phone is now ready to make and receive calls.
If you would like to know How to enable call forwarding on Yealink T33, please read our Help Centre article for further assistance.
If you still need assistance, please contact our friendly support team using one of the support channels.