

How to set up your Huawei WiFi AX3 WS7100 Fibre Router for a PPPOE connection
Some fibre providers require you to configure your router for a PPPoE connection using an Afrihost-issued username and password, which you will receive via email once your Fiber order is activated. To authenticate on the network, you must log in to the router and enter your Afrihost credentials
The Huawei WiFi AX3 WS7100 router is compatible with DHCP or PPPoE configuration.
PPPoE is used for Openserve and Vodacom connections only. DHCP is used for all the other fibre providers.
DHCP connects by obtaining an IP address and then connects automatically and should not require set up. PPPoE connects via an ISP and requires a username and password.
Set up the Huawei AX3 WS7100 Fibre Router for PPPoE
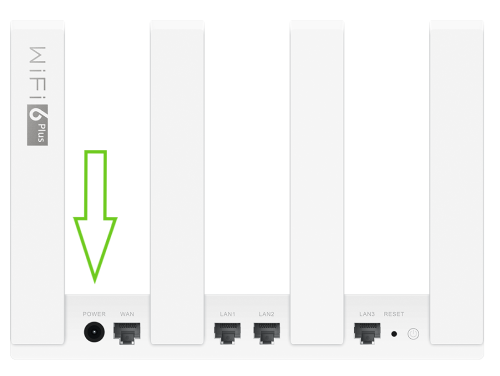
1. Connect the router to power
- Plug in the power supply adapter to the router and a plug into an electrical power point to power up the router.
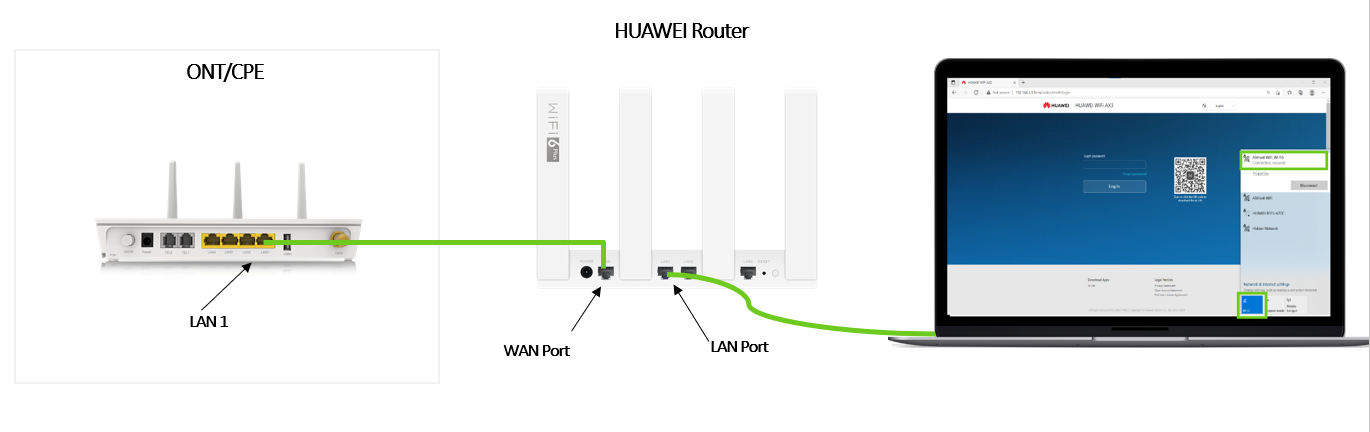
2. Connect the Huawei Router to the ONT/ CPE
If you would like to know more about what a Fibre ONT/ CPE is, please read our Help Centre article for more information.
- Ensure the CPE is powered up and lights are showing on the device.
- Connect your Huawei router to the CPE/ONT using an ethernet cable.
- The cable must be connected from LAN Port 1 on the ONT device to your fibre router’s Internet/WAN port.

3. Connect to the router via WiFi or directly via LAN cable
Connecting via WiFi
- Connect your computer to the router's WiFi.
You can look for the WiFi name on the sticker at the bottom of the router. - Open the WiFi settings on your computer device (desktop or laptop) and select the appropriate WiFi to connect with.
Connecting via ethernet
- Using an extra ethernet cable, plug one point of the ethernet cable to the network port of your computer and other point to any of the LAN ports on the fibre router.
Set up the Huawei AX3 WS7100 Fibre Router for a PPPoE connection
4. Log into the router
Connect to your router via LAN or WiFi to your computer.
Once the connection has been established:
- Log in to the router’s web-based interface configuration page.
- Open your internet browser and enter the device's IP address to access the router.
- Enter 192.168.3.1 in the browser search bar.

- Log in to the router with the password.
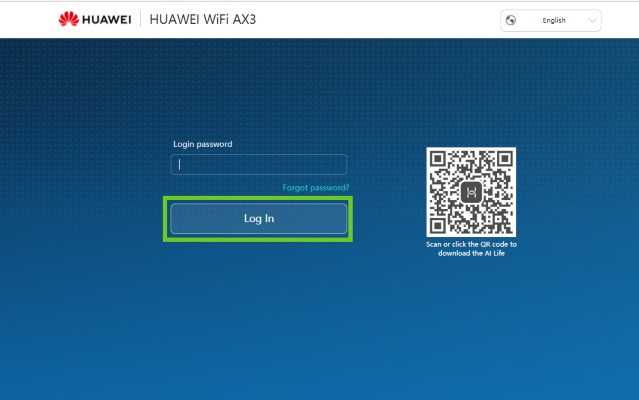
If this is the first time you are logging in to the router, the configuration page will automatically be loaded or the password can be found underneath the router or it is the password you had pre-configured.
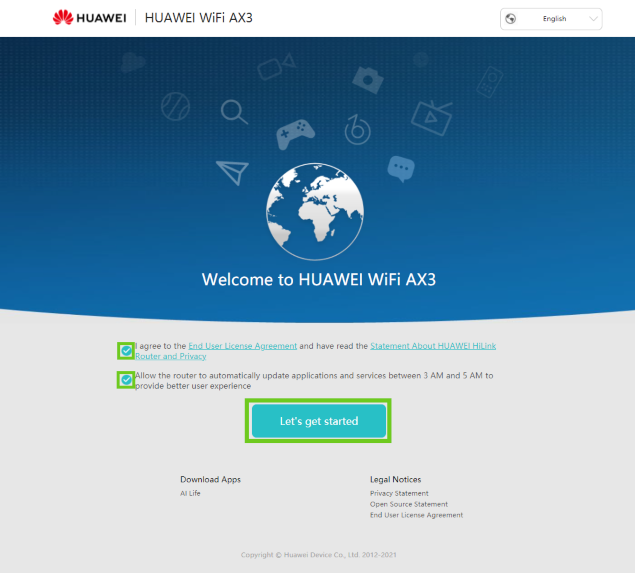
A welcome screen will appear.
- Tick the box to accept the End User License Agreement.
- Tick the box to allow the Automatic Updates.
- Select ‘Let’s get started'.
5. Configure the router
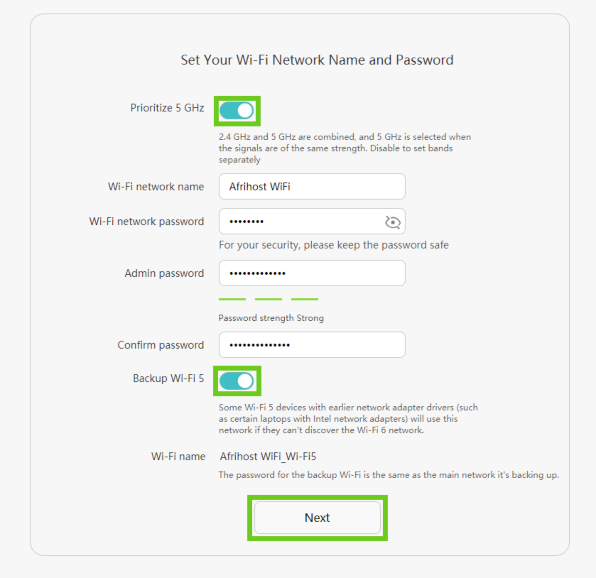
Set your WiFi network name & password.
- Activate ‘Priortitze 5 GHz’. This will combine both 2.4GHz and 5GHz signals.
- Enter your desired Wi-Fi network name and Wi-Fi network password.
- Enter an admin password for the router. This is to access the router in future.
- Enable ‘Backup WiFi 5’ network, this will allow older devices to detect the router's WiFi 6 network.
- Select ‘Next’.
If you would like to know more about Password Security and how to stay safe online, please read our Help Centre article for more details.
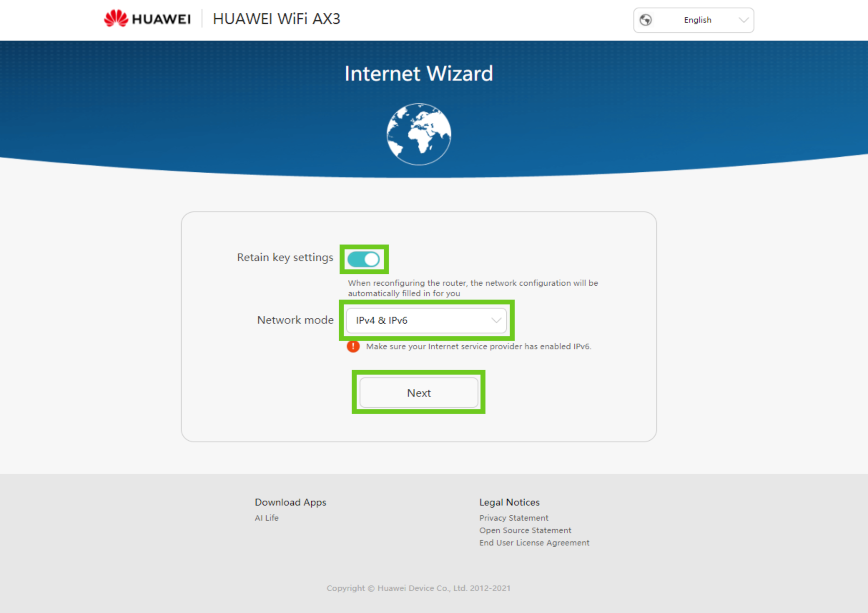
- Enable the ‘Retain Key Settings’ option on the Internet Wizard page. This means the network settings will be saved when reconfiguring the device.
- Network Mode: IPv4 & IPv6.
- Select ‘Next’.
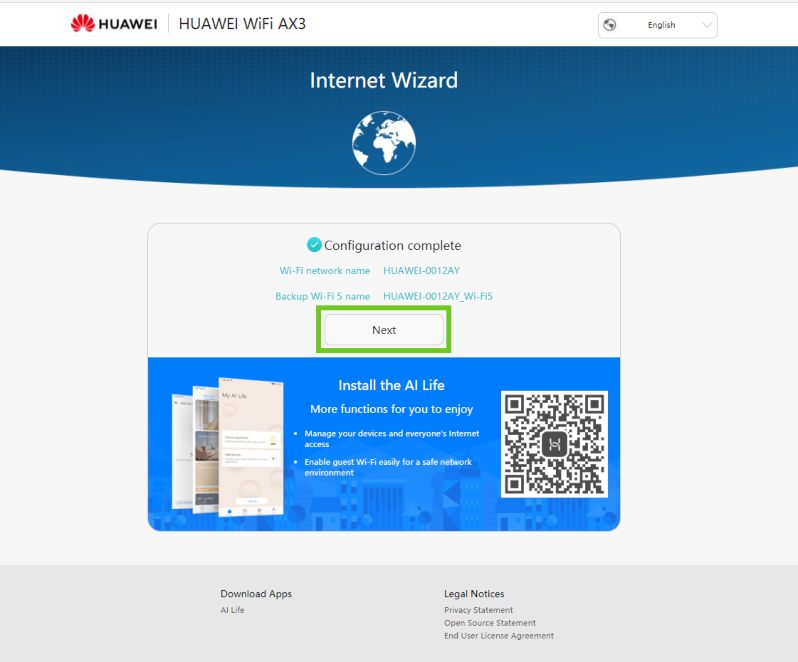
- The configuration is now complete. Select ‘Next’ to go to the home page.
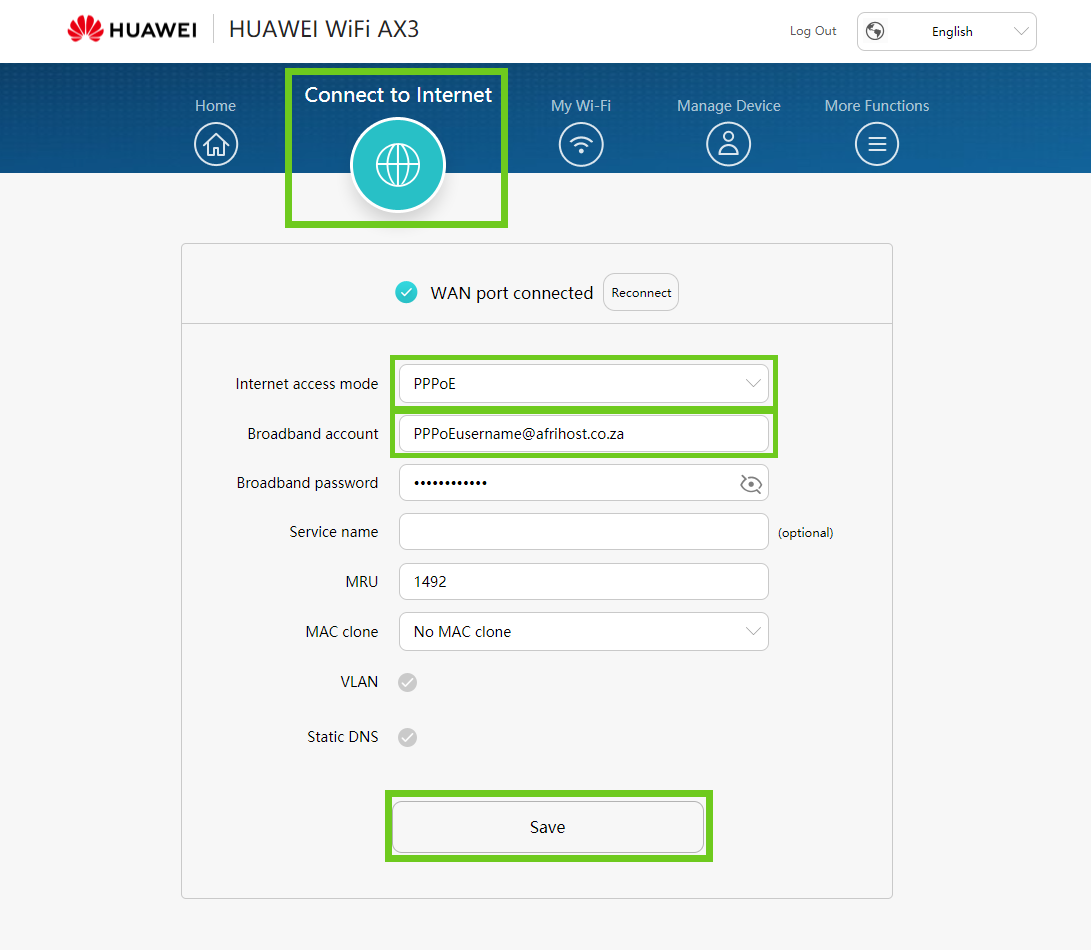
- When on the home screen select the ‘Connect to Internet’ tab to change settings.
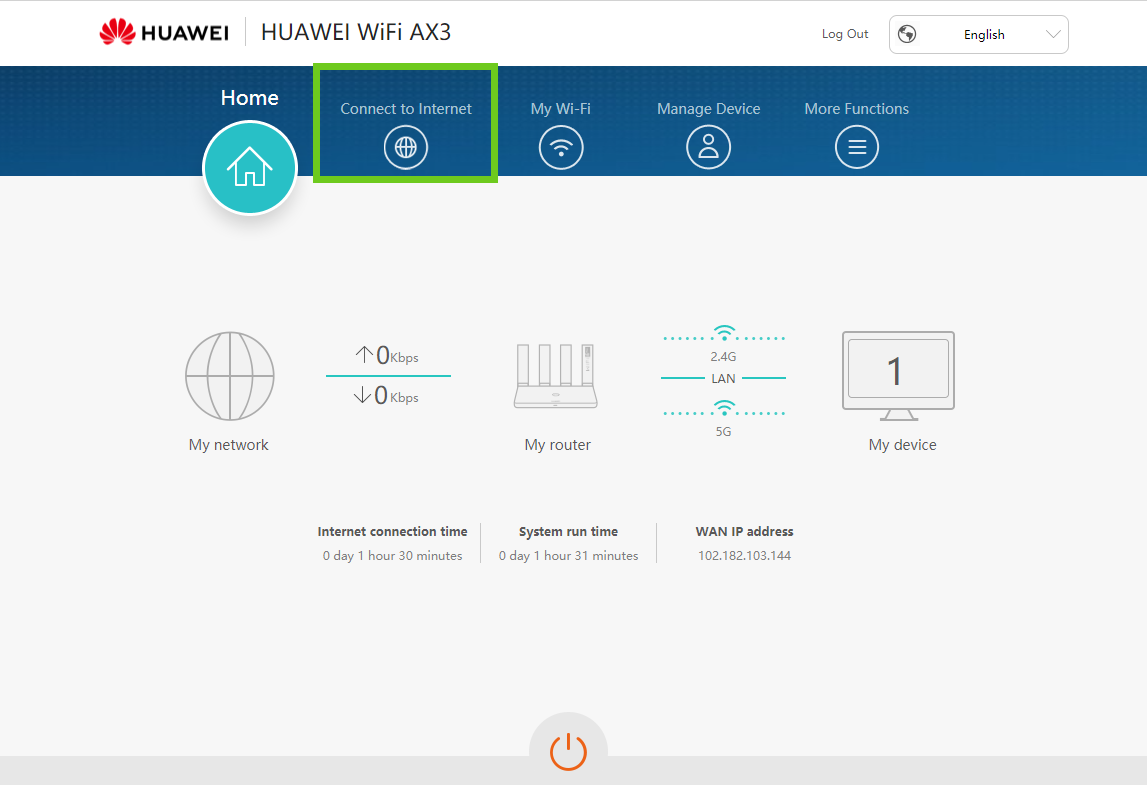
- Internet Access Mode: PPPoE.
- Broadband account and password - Enter the username and password supplied by Afrihost.
- Service name - leave blank
- MRU - 1492
- MAC Clone - No MAC clone
- Select ‘Save’ to save these settings.
Log into ClientZone.
Click on the ‘Connectivity’ tab.
Select your relevant Fibre package in the right-hand side.
Click on the ‘View Product’ button.
Your username is displayed at the top of the panel, below your package.
To get your password, click on the ‘Access Details’ button.
Click ‘Reset Password’.
In the success pop-up window, copy your newly generated password, save it and click ‘Okay’.
The PPPoE configuration is now complete.
- The front light indicator should be steady green which indicates that you are now connected to the Internet.
- If you are connected via WiFi you will need to reconnect to the router's WiFi to access the Internet.
If you would like to know How to set up your Huawei AX3 WS7100 V2 FOR PPPoE connection please read our Help Centre article for further assistance.
Download the app in the Google Play Store, Huawei users from the Huawei AppGallery and iOS users from the Apple App Store.
How to set up your Huawei WiFi AX3 WS7100 Fibre Router for a PPPOE connection
03:01