

How to set up your mail in Apple Mail
Streamline your email experience by setting up one or multiple email accounts in Apple Mail. This allows you to access your emails without logging in each time. This article will guide you through a step-by-step process to set up and start using your emails in Apple Mail.
If you would like to know How to create an email account on your domain, please read our Help Centre article for further assistance.
Basic setup
- Open your Apple Mail application.
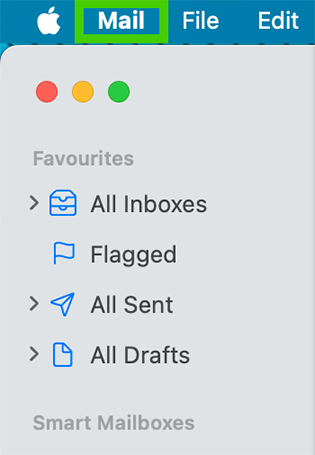
- In the top left-hand corner select the ‘Mail’ option.
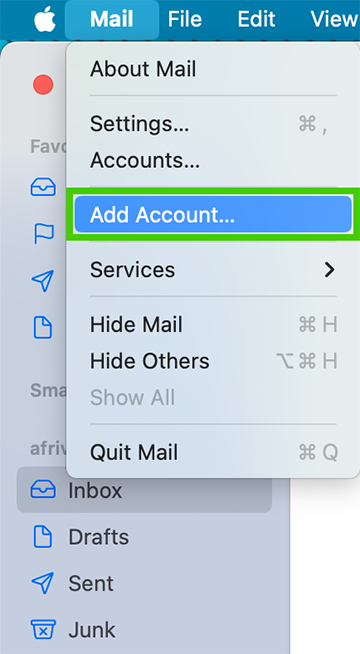
- Select ‘Add Account’ on the sub-menu below.
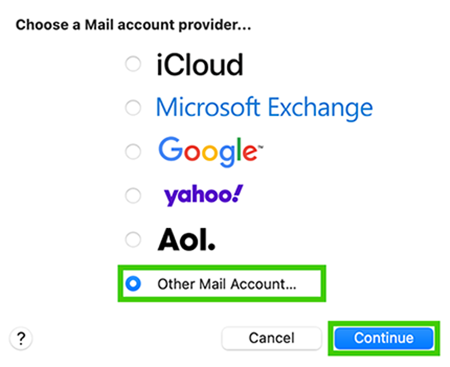
- Various email providers will appear, select ‘Other mail account’ and click continue.
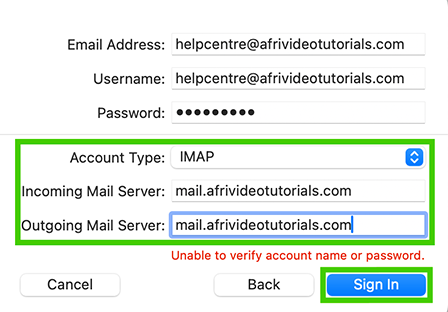
- Enter the account name. This is the name that your recipients will see when they receive your emails.
- Enter the email address you are setting up.
- Enter a secure password for the email account.
- Select ‘Sign In’ to proceed.
If you would like to know How to update your email password in cPanel please read our Help Centre article for further assistance.
If you would like to know How to update your email password in CWP please read our Help Centre article for further assistance.

You may be prompted to provide more details if a block appears stating it was unable to verify the account name or password. The username is the same as the email address provided.
- Under account type, you can choose between IMAP or POP (IMAP is recommended).
If you would like to know more about The difference between POP, IMAP & SMTP and which one to use, please read our article to find out.
- For the ‘Incoming and Outgoing Mail Server’ always enter mail (dot) your domain name. For example, mail.mydomain.co.za
- Check that all your details are correct and select 'Sign in'.
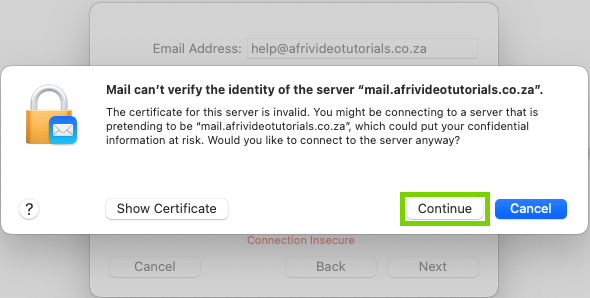
- You may get a certificate error notification saying: ‘Mail can’t verify the identity of your server and your domain name’, simply click ‘Continue’.
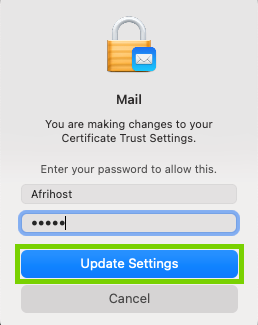
- Enter your Apple device's Admin login credentials and select ‘Update Settings’.
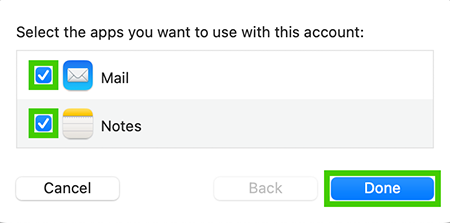
- Select the Apps you wish to use with this email account and click ‘Done’.
Your emails will then start coming through to your Apple Mail.
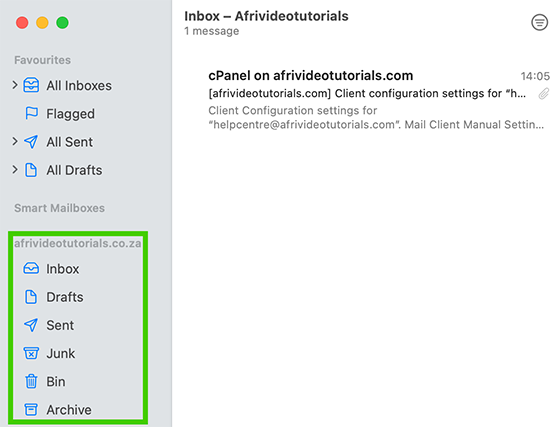
Congratulations, you have successfully set up mail in your Apple Mail.
If you would like to know How to setup email on Apple iPhone, please read our Help Centre article for further assistance.