

How to configure the TP-Link Deco to work in wireless router mode
The wireless router option means that one TP-Link Deco unit will be used as your primary router and the other TP-Link Deco unit will be used as a WiFi access point. The Deco device will act as a DHCP server to assign IP addresses to connected devices.
- 2 x TP-Link Deco devices.
- 1 x Fibre ONT/CPE.
- 1 x Ethernet cable.
- TP-Link Deco app.
Follow these steps to set up your TP-Link Deco in wireless router mode:
- Download the TP-Link Deco app.
- Connect the Deco to your Fibre ONT/CPE.
- Setup your TP-Link Deco device via the app.
- Add a second Deco as a WiFi access point.
1. Download the TP-Link Deco app
The TP-Link Deco can only be set up through the TP-Link Deco app.
Ensure you have the latest version of the TP-Link Deco app downloaded to your mobile device in order to set up your mesh network.
iOS users can download the app from the Apple App Store and Android users from the Google Play Store.
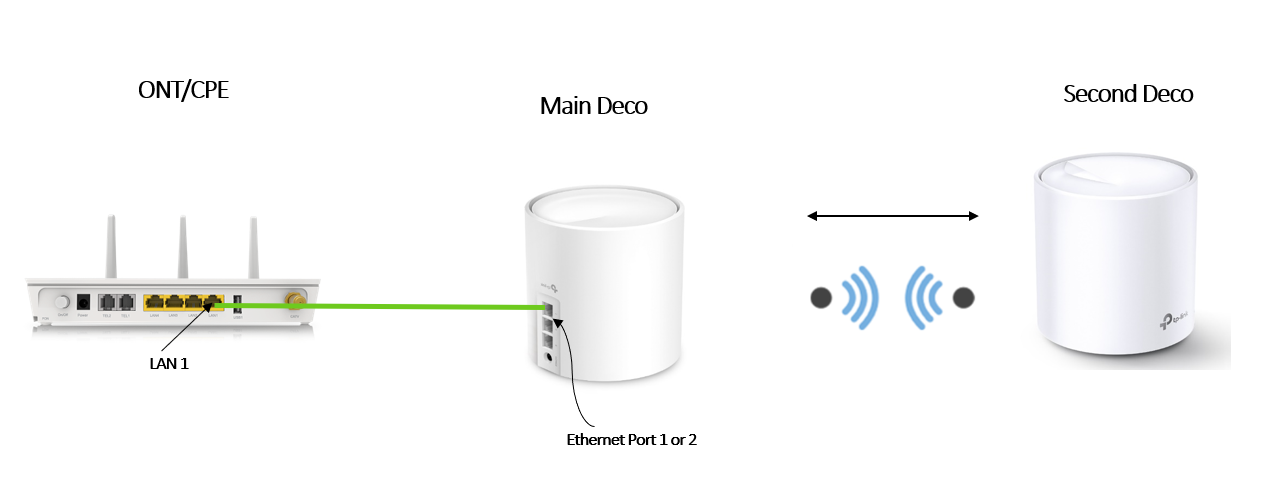
2. Connect the Deco to your Fibre ONT/CPE
- Disconnect the ONT/CPE from the power supply.
- Plug the ethernet cable to either of the two ports on the Deco. The Deco will then auto-detect the connection.
- Plug the other end of the ethernet cable into Ethernet or LAN 1 port of the Fibre ONT/CPE.
If you are with TT Connect, use LAN port 5 on the ONT. - Power on both your Deco unit and ONT/CPE unit.
Once all devices are powered up:
- Allow both your Deco device and ONT/CPE to start up, wait approximately 2 minutes until the light indicators on the ONT/CPE are steady green.
- Wait until the LED on the Deco is pulsing blue which indicates that it is ready for set up.
3. Setup your TP - Link Deco via the app
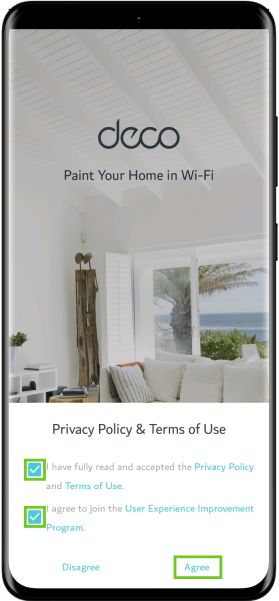
- Once the app is installed on your device, open the app.
- Tick the check box to accept the ‘Privacy Policy and ‘Terms of use’.
- Tick the check box to join the ‘User Experience’.
- Select ‘Agree’.
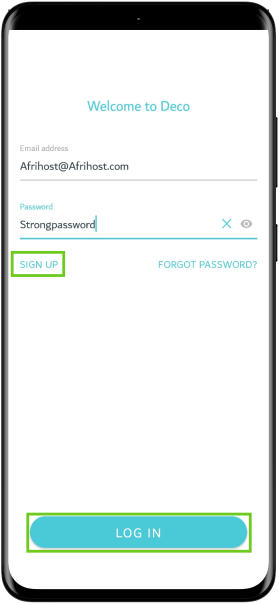
You are required to create a ‘TP-Link ID’ which allows you to manage your TP-link home network and devices. This ID is used for password resets when users are unable to log in to the router software. Read here to find out How to create a TP-Link ID using the Deco app.
- Log in with your TP-Link ID or sign up if you don’t have an ID.
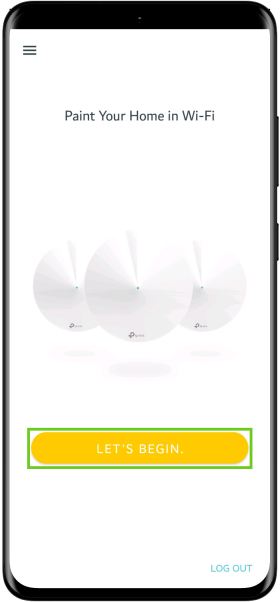
- Select ‘LET’S BEGIN’.
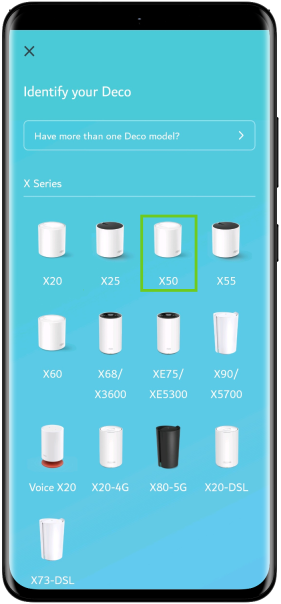
- Select the corresponding icon according to your Deco’s model number.
The following screens will appear to verify the following:
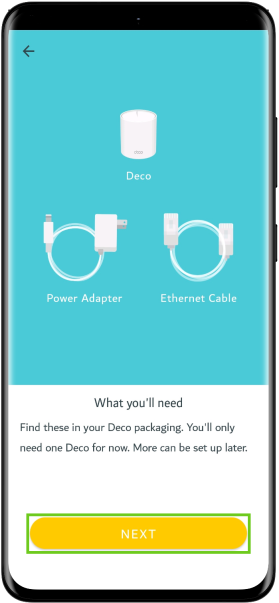
- ‘What you’ll need’ - All items will be supplied in the box.
- Select ‘NEXT’.
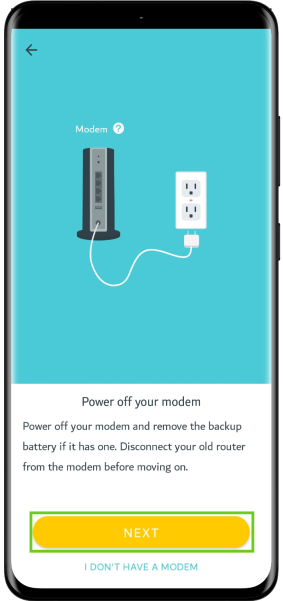
- ‘Power off your modem: We have already done this in the steps above. Ensure your device is off.
- Select ‘NEXT’.
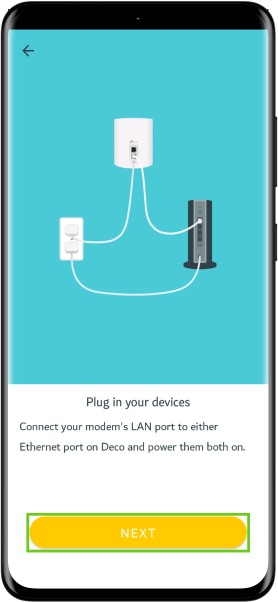
- ‘Plug in your devices’: We have already done this in the steps above. Please ensure all your devices are connected and the power is on.
- Select ‘NEXT’
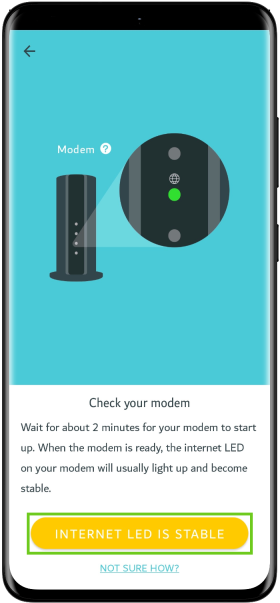
- ‘Check your modem’: Ensure that light indicators of both the router and ONT/CPE are steady green.
- Select ‘INTERNET LED IS STABLE’.
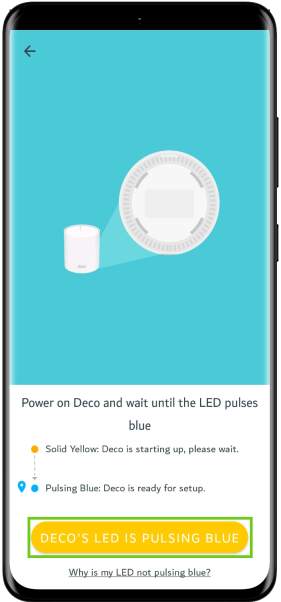
- ‘Power on Deco and wait until the LED pulses blue': Make sure that the Deco LED light is pulsing blue, which indicates that it is ready for setup.
- Select ‘DECO’S LED IS PULSING BLUE’.
You will be prompted with the screen to accept location.
- Select ‘ALLOW ONLY WHILE USING THE APP’.
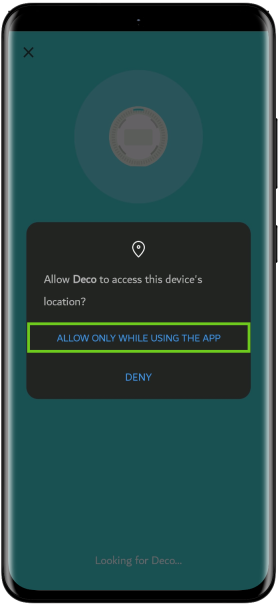
Access to your location data is required to find and connect to the Deco. If you deny the location permission, you won't be able to complete the set-up.
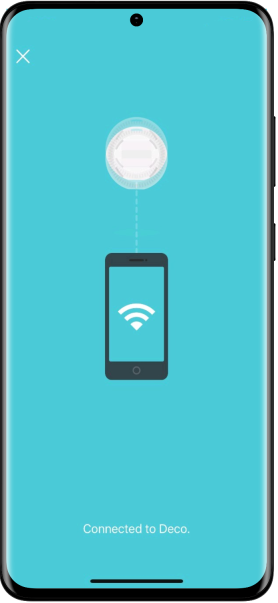
- The Deco will create a WiFi network, (Deco_XXXX).
- Select ‘Connect’ to join that network on your phone and the Deco will automatically be detected.
If the prompt to connect does not appear, connect your mobile phone to the Deco’s WiFi network manually.
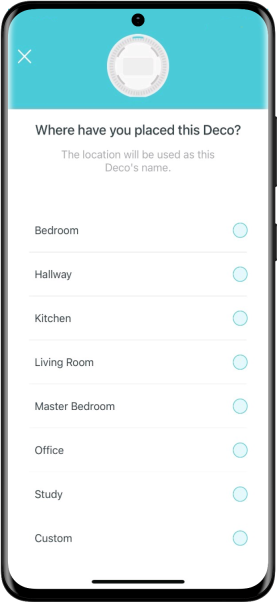
- Choose a location for this Deco. If the location is not listed, you can create a new one by selecting ‘Custom’.

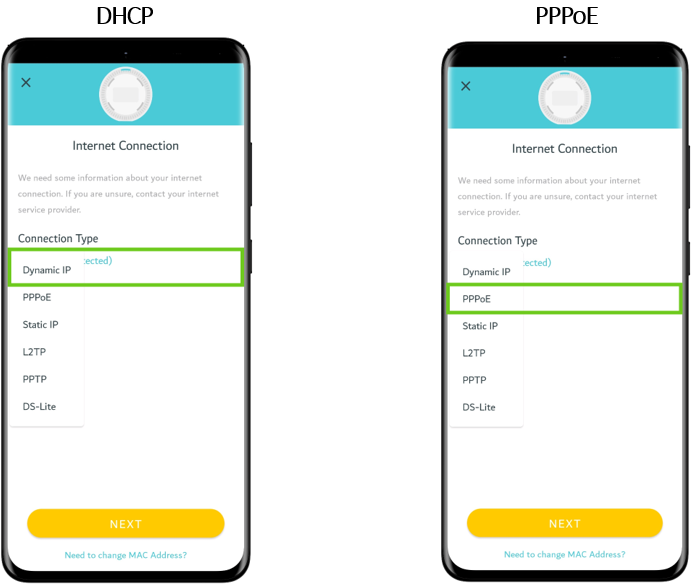
Deco app will search to detect what type of internet connection you have.
PPPoE is used for an Openserve & Vodacom connection only. DHCP is used for all the other fibre providers.
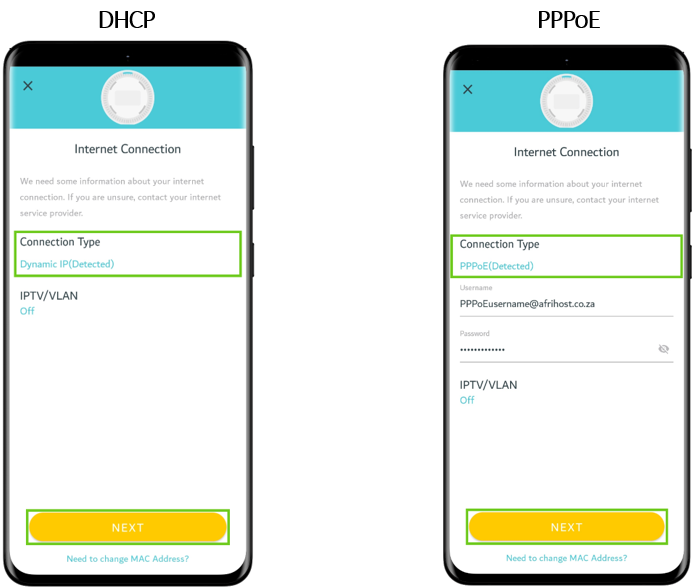
DHCP connects by obtaining an IP address and then connects automatically and should not require set up. PPPoE connects via an ISP and requires a username and password.
Connection Type:
- Select ‘Dynamic IP’ For DHCP.
- Select ‘PPPoE’ if you are connected through a PPPoE connection.
- For a PPPoE connection, insert your PPPoE username and password.
- Select 'NEXT’.
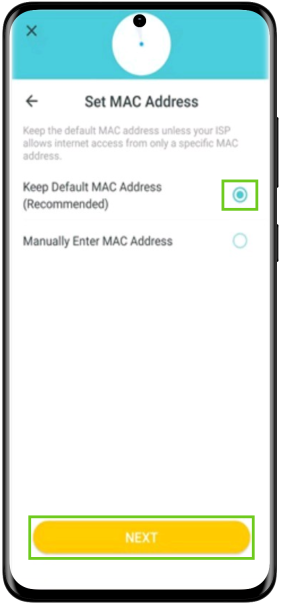
- Select ‘Keep Default MAC Address’.
- Select 'NEXT’.
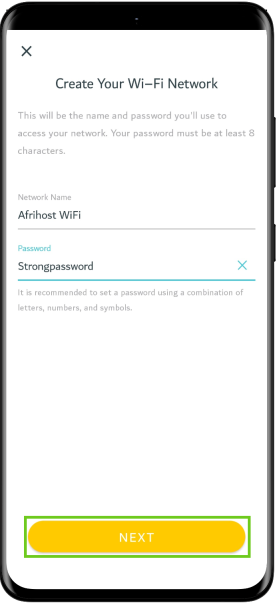
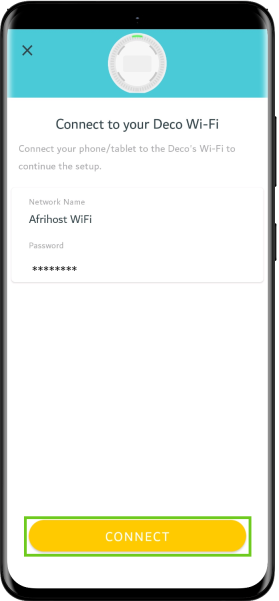
- Create your Wi-Fi network name and password.
- Select ‘NEXT’.
- Confirm your newly created WiFi network and select ‘CONNECT’ to join that network on your phone and the Deco will automatically be detected.
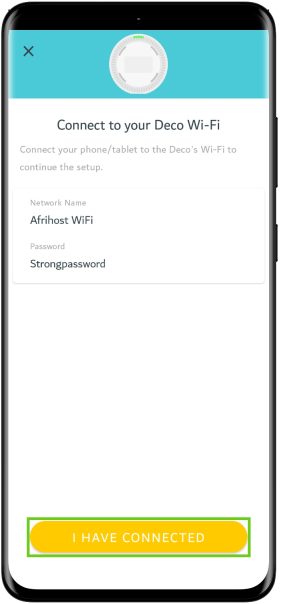
If the prompt to connect does not appear, connect your mobile phone to the Deco’s WiFi network manually.
Once the connection has been established, go back to the app, and select ‘I Have Connected’, the app will begin to search and detect the Deco device.
- The Deco will test your connection and go online.
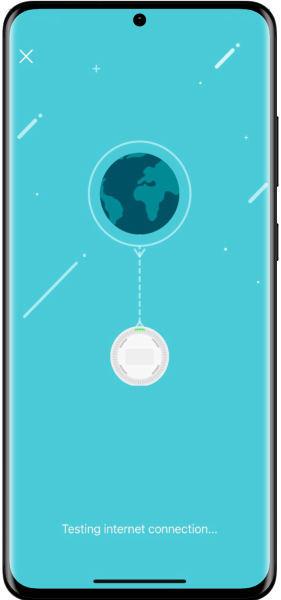
The light indicator of the Deco should be a steady green which indicates that you are now connected to the internet.
- Select ‘NEXT’
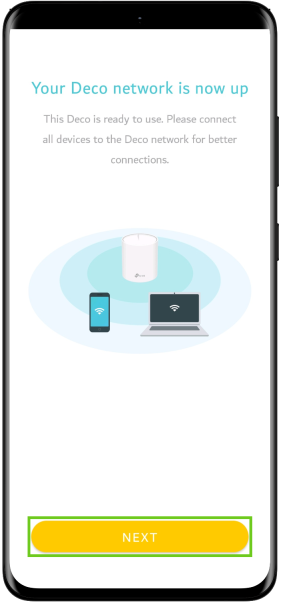
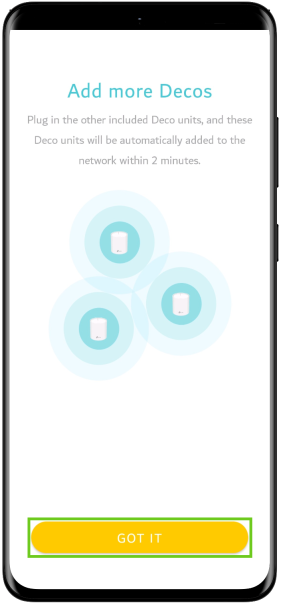
- You will be prompted with the option to add another Deco device.
- Select ‘GOT IT’
4. Add the second Deco as a WiFi access point
Now that the main Deco device has been configured, you can link a second Deco device to connect in a cascade arrangement and create your mesh network.
4.1 Connect the second Deco unit to power
- Plugin the power supply adapter to the Deco and plug it into an electrical power point to power up the second Deco.
4.2 Add the second Deco unit using the Deco App
- If the second Deco that is going to join the Deco network is the same model as the main Deco, (e.g., X50 and X50), simply plug in the new Deco and it will be automatically added to the Deco network within 2 minutes.
If your second Deco was previously configured, please reset it to the factory default settings.
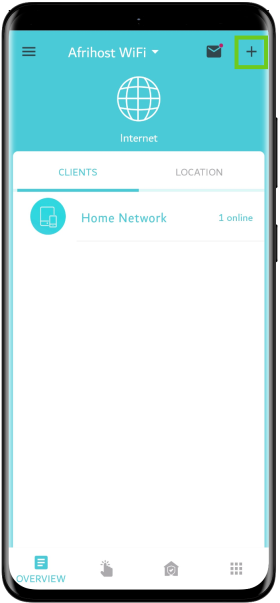
- Select the ‘+’ plus icon at the top right of the screen to add a new Deco unit.
- Select ‘DECOS’
- Select the Deco icon according to your Deco’s model number.
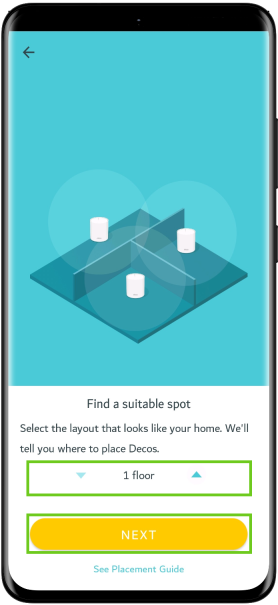
- Select the layout that looks like your home and device location and click ‘NEXT’.
- ‘Power on Deco and wait until the LED pulses blue': Make sure that the Deco LED light is pulsing blue, which indicates that it is ready for pairing.
- Select ‘DECO’S LED IS PULSING BLUE’.

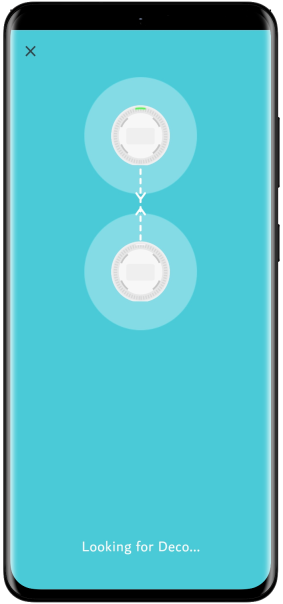
- This will allow the devices to scan and pair with each other.
- The light indicator will blink blue. The LED light will turn solid blue when a connection is established.
- Choose a location for this Deco to be placed. If the location is not listed, you can create a new one by selecting ‘Custom’.
- The app will then optimise your network and the LED indicator of the second Deco device should remain steady green, which indicates that the connection is successful.
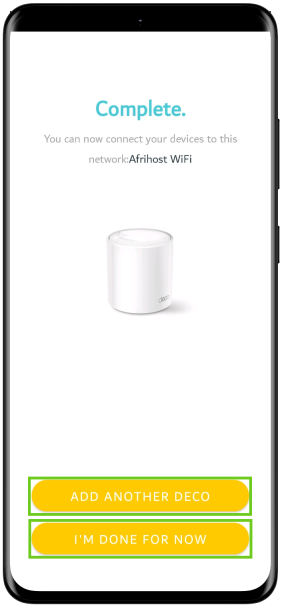
The setup is complete! You can now add another additional Deco unit or exit.
- Select ‘I'M DONE FOR NOW’ to exit.
- Select ‘ADD ANOTHER DECO’ to add an additional Deco. Repeat the process above if you want to connect multiple Deco WiFi points.
You have successfully completed the mesh network configuration and added a second device! You may now connect your device to the network, and you will be able to get connections throughout the premises where the nodes are located.
For optimal and seamless uninterrupted WiFi coverage, it is recommended that you enable ‘Fast Roaming’. Read our helpful article on How to enable fast roaming on the Deco App.
WiFi repeaters, range extenders and Mesh devices can help improve the signal, but they are not always a complete solution, and the signal can still be erratic. Read our Help Centre article on How to improve your home WiFi.